March 28, 2019
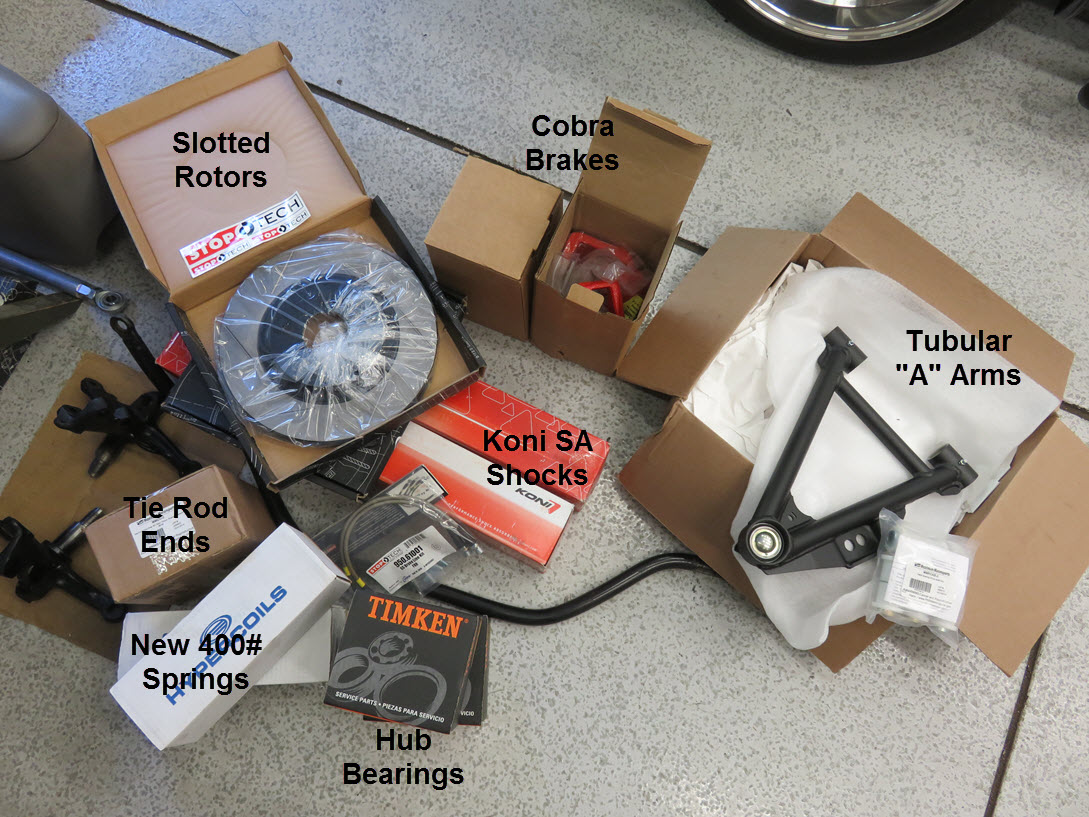
Work has started on transforming the car into a suitable track and street machine. I'm installing a complete chassis workover with Maximum Motorsports parts. I ordered my parts from Custom Alignment and will be having them do the chassis setup once I'm done. The setup will include, new "K" member, tubular offset lower control arms, Koni SA coil/over shocks and upgraded steering shaft. New bushings and hardware will be installed along the way that was included with my order.
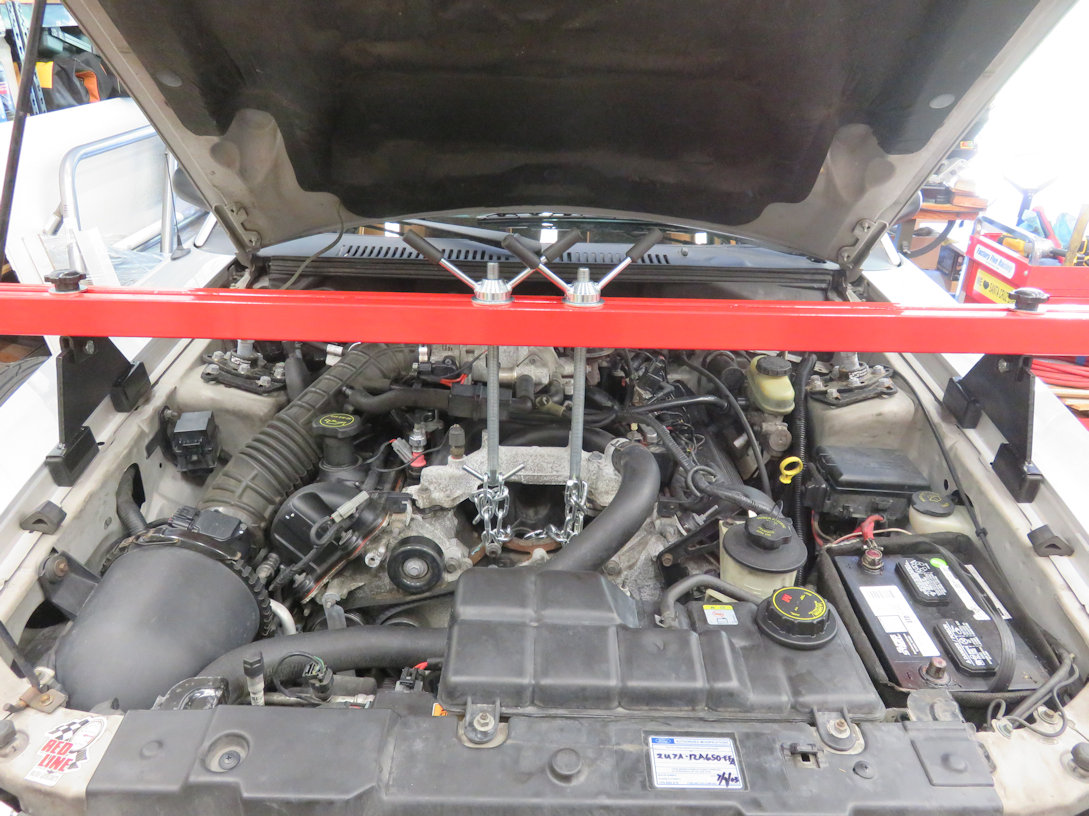
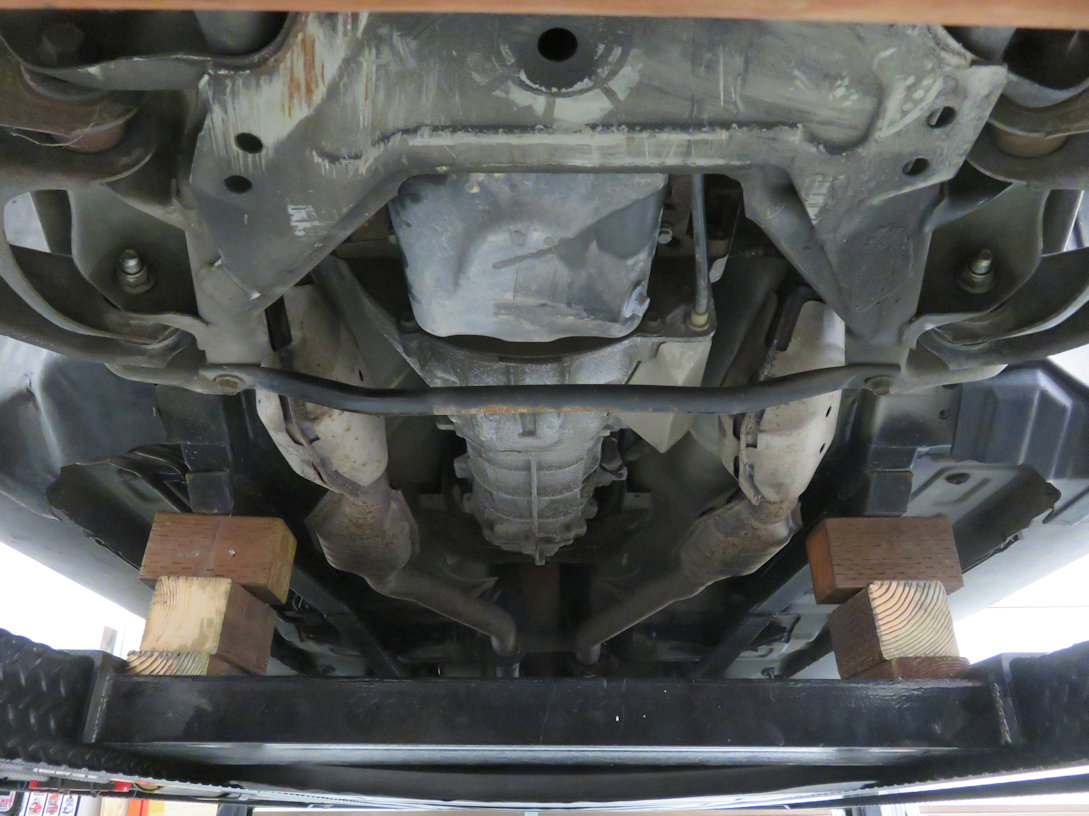
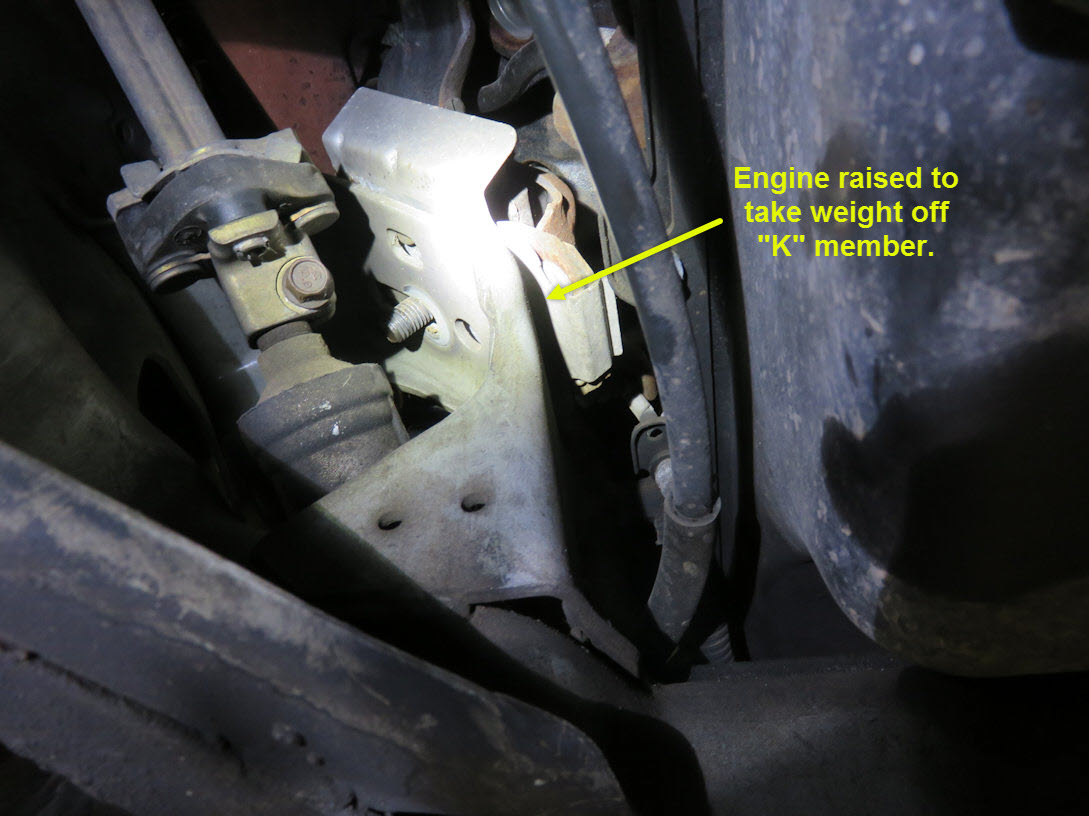
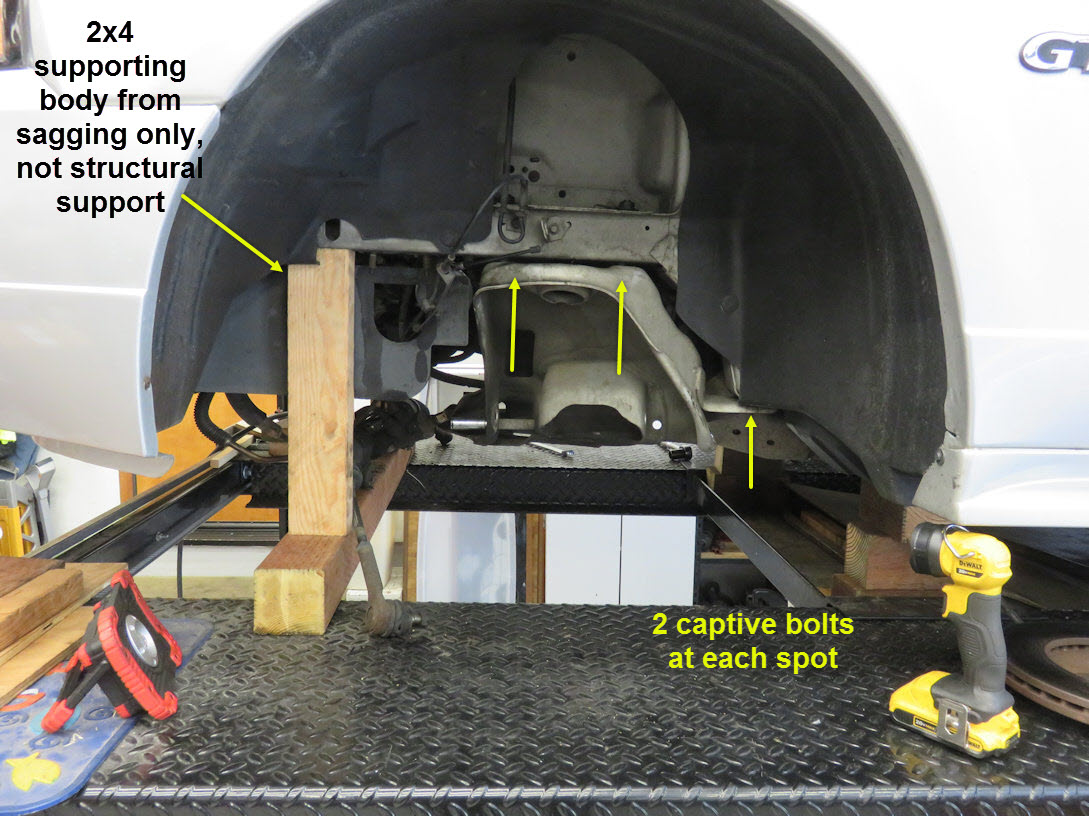
First order of business was getting the car in the air on my rack and lifting it up to place on blocks for me to work. The full frame "frame pieces" helped a lot allowing me to support the chassis at the front most part. This left the entire lower suspension area free from items in the way. Next was to secure the engine in the air a bit to allow the motor mounts to be loosened and engine lifted to allow the "K" member to be removed. I installed my engine support bar after removing the alternator and securing the lift points from it's mount area on the block. Wheels and tires were removed and now it's on to the tear down!
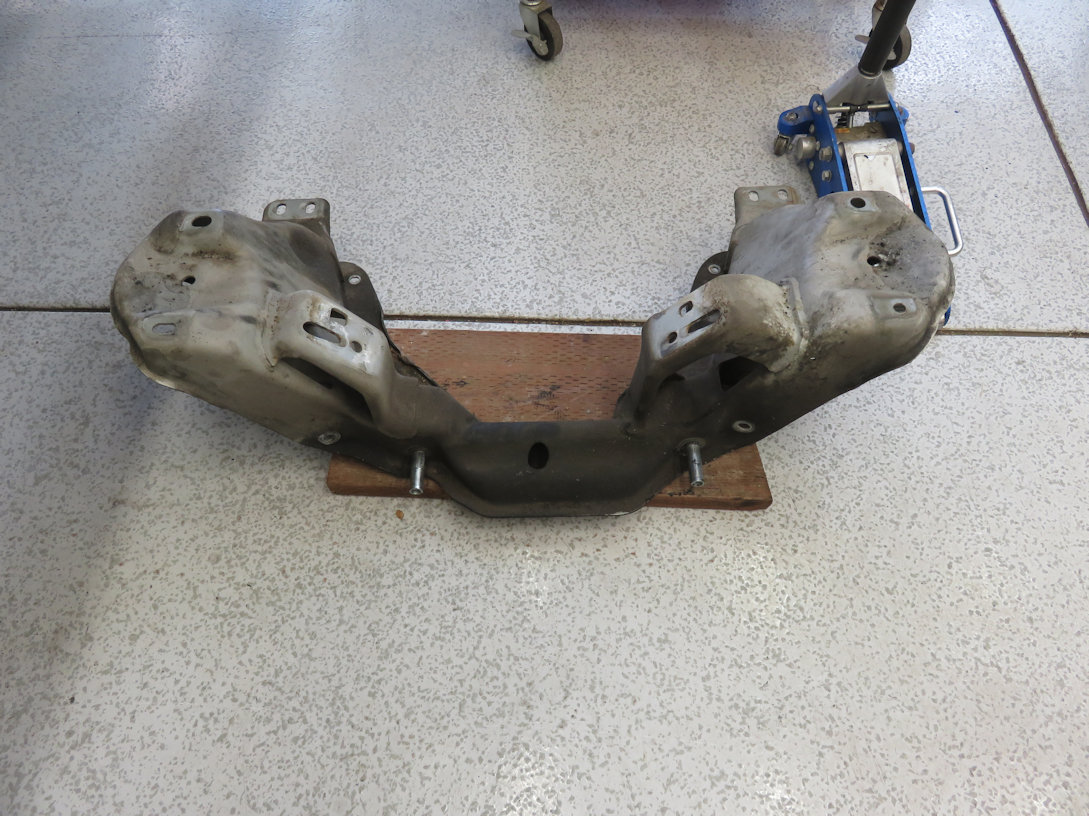
Starting with the suspension pieces I removed the brakes, baking plates, tie rods, steering rack, lower control arms, springs and shocks. Most is fairly simple but do take care when lowering the LCA because of the spring pressure. DO NOT take the strut shock off yet! It will still need to stay secure to the spindle and upper tower. Best practice is to loosen the ball joint nut about 1/4" or more and then place a floor jack under the LCA leaving a bit of space between the pad and bottom of the LCA. Then take a 3# hammer or small sledge and start tapping on the spindle near the ball joint nut until it "pops" free and lowers on the nut still holding the ball joint. The jack is there to hold it all in place. Now jack up the control arm until there is space beneath the ball joint nut and remove the nut. The jack will be holding the control arm. Slowly, and I mean slowly, lower the floor jack while watching the spring release tension. Be aware, this can fly out if you're not careful. Once the spring is free, you can safely lower the jack all the way, remove the spring and then remove the LCA from the "K"member. Now you can safely remove the spindle and shock strut assembly.
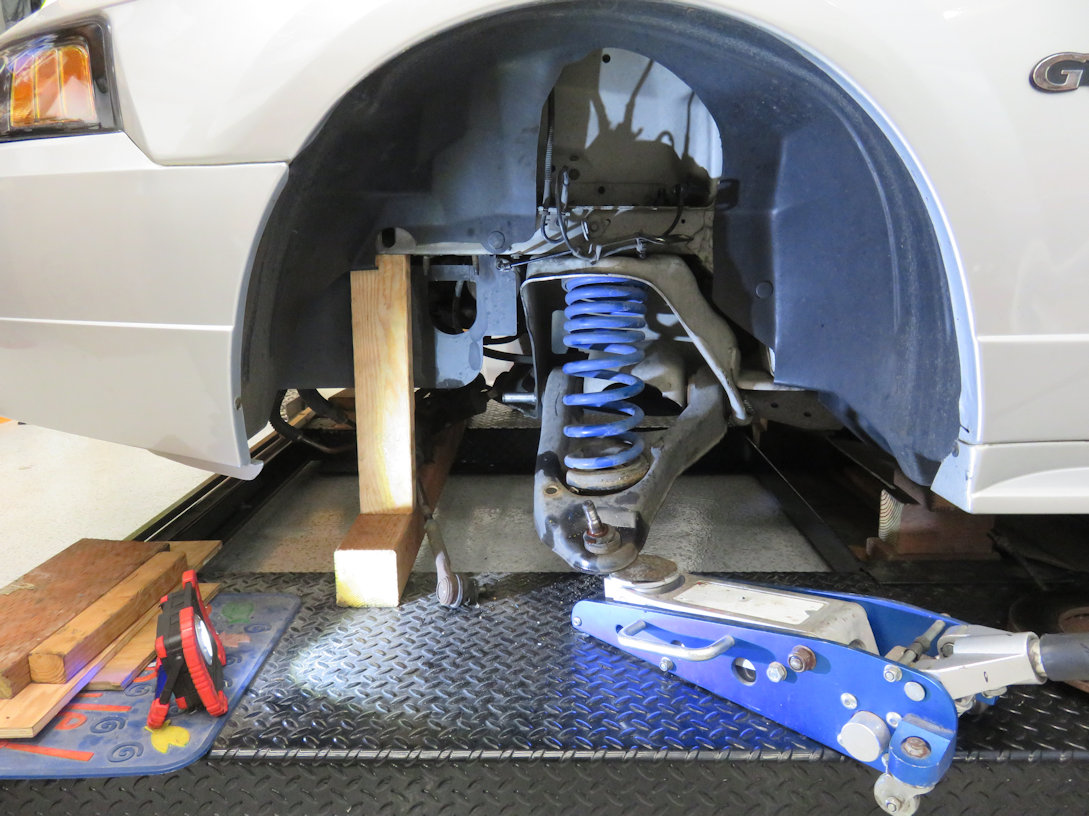
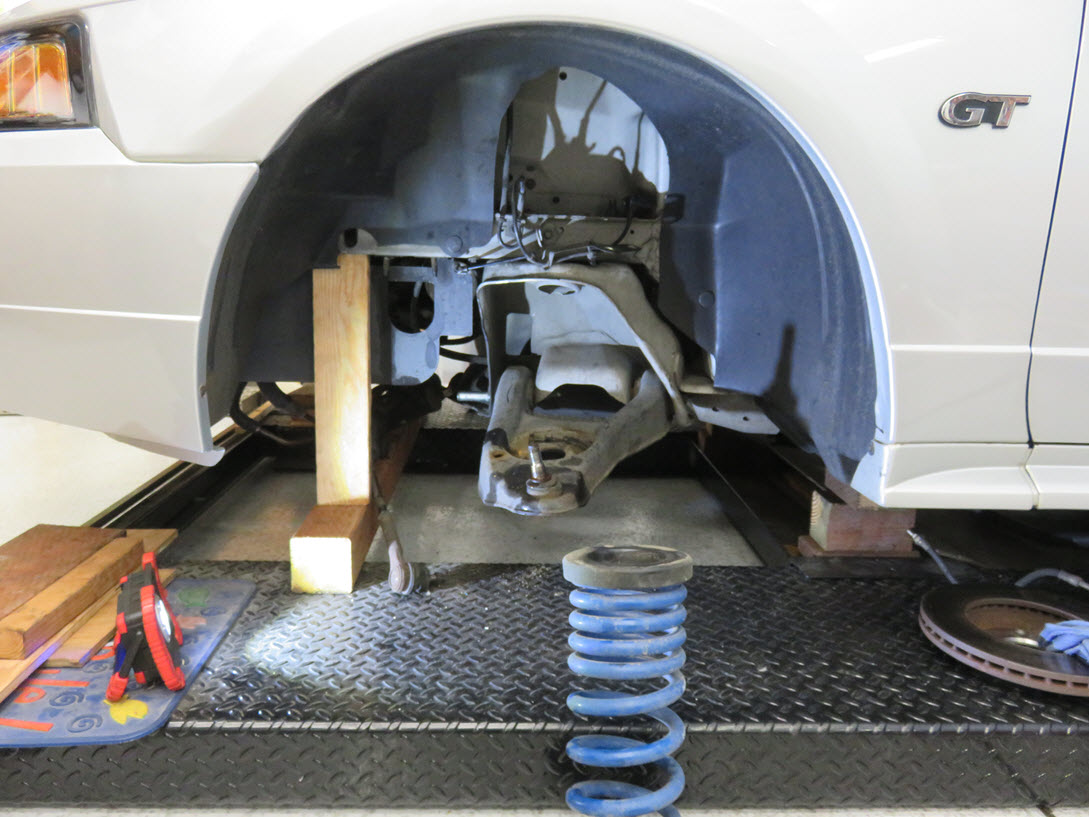
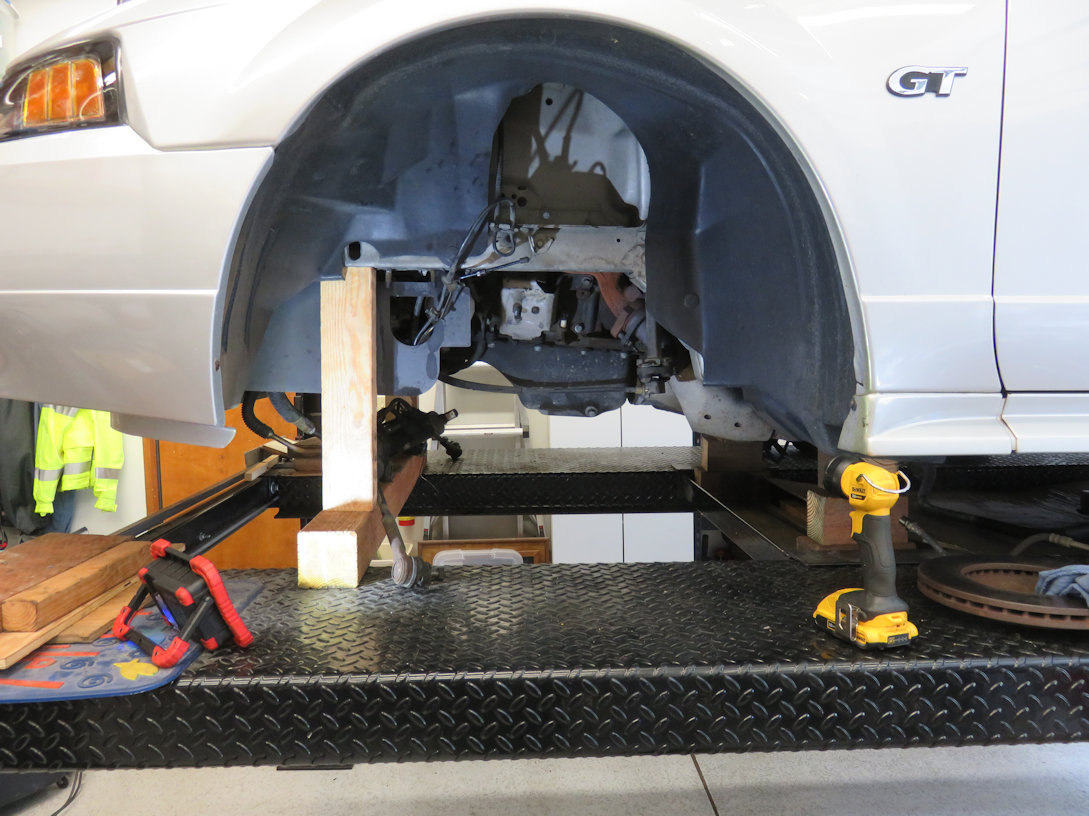
With the engine supported, you can now remove the "K" member from the chassis. Loosen the two bolts under the spring perch area on the chassis but don't remove yet. Then remove the two short bolts on the rear of the "K" member and place a jack or get a helper to assist in supporting the "K" member and remove the remaining two bolts on each side of the chassis. You should now be able to remove the "K" member from the chassis. If you have a jack, you can forgo removing the LCA's and take them with the "K" member all at once. I chose to remove the LCA's just to make things easier.

After that was out of the way I proceeded to remove the oil pan, engine mounts, steering shaft and clutch cable. All of these are being replaced. I installed my new Canton road race pan, Energy Suspension engine mounts and while there, decided to install new BBK ceramic coated CARB Legal shorty headers. This is on the Mustang Engine page.
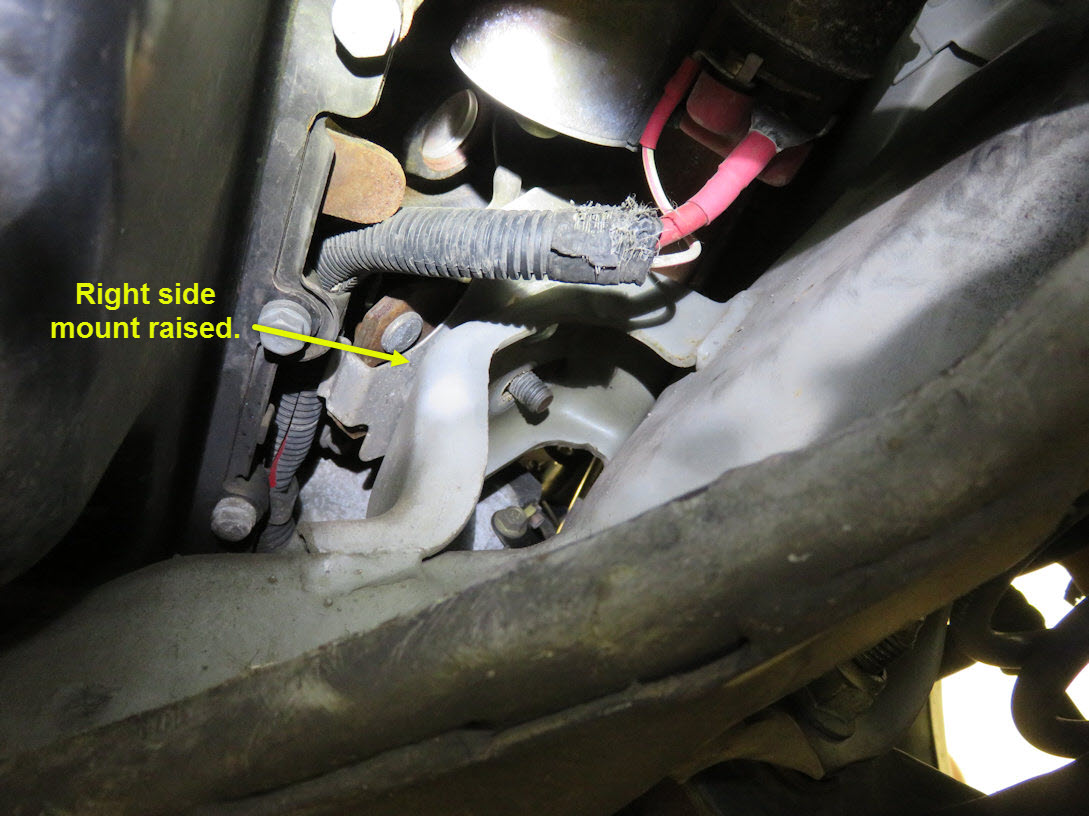
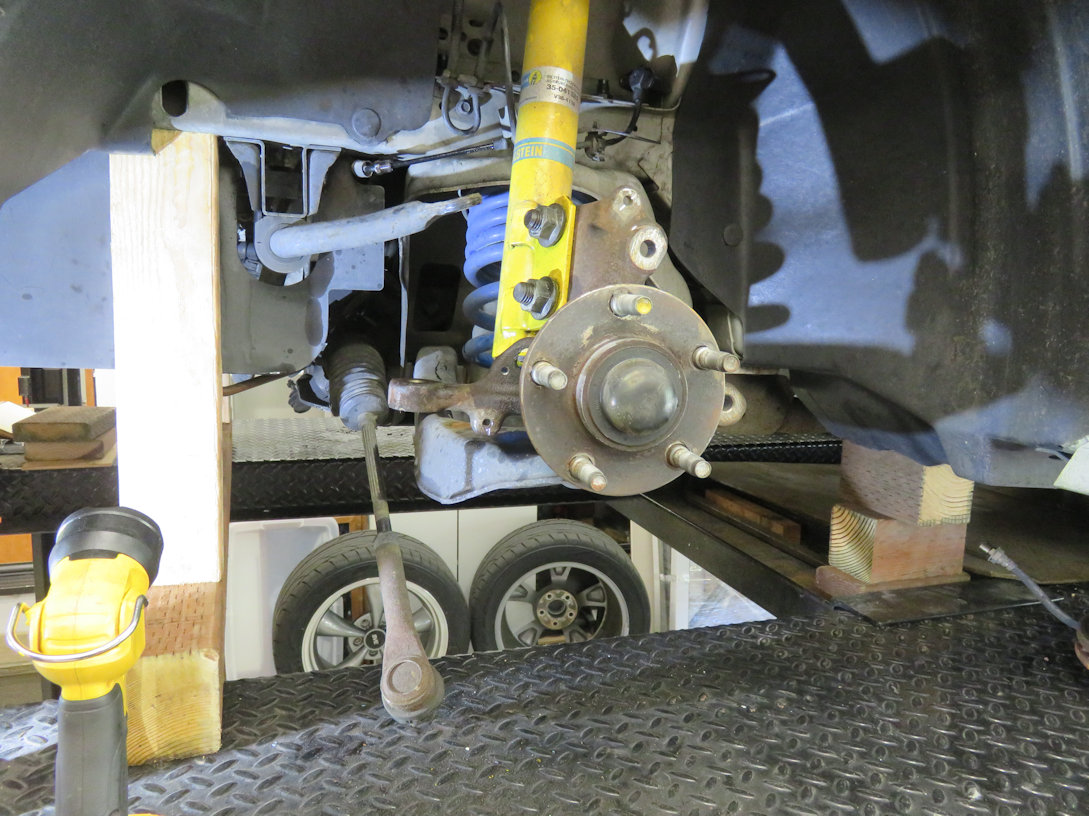
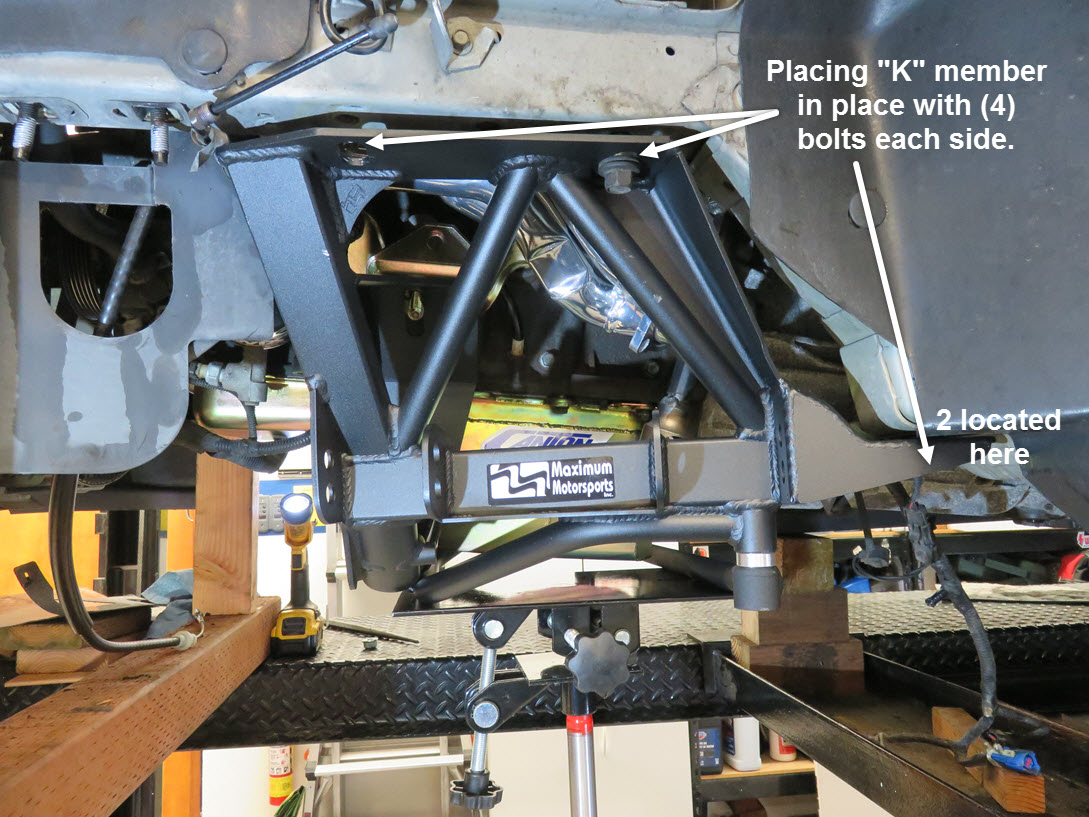
Maximum Motorsport parts are top notch. They are definitely works of art! I removed the stock rag joint steering shaft and lubed the needle bearing in the firewall adapter then installed the new welded U-joint shaft from MM. Next was the engine mounts and then came the new "K" member. A few brake lines needed to be moved on the right forward chassis side, but not a big deal.


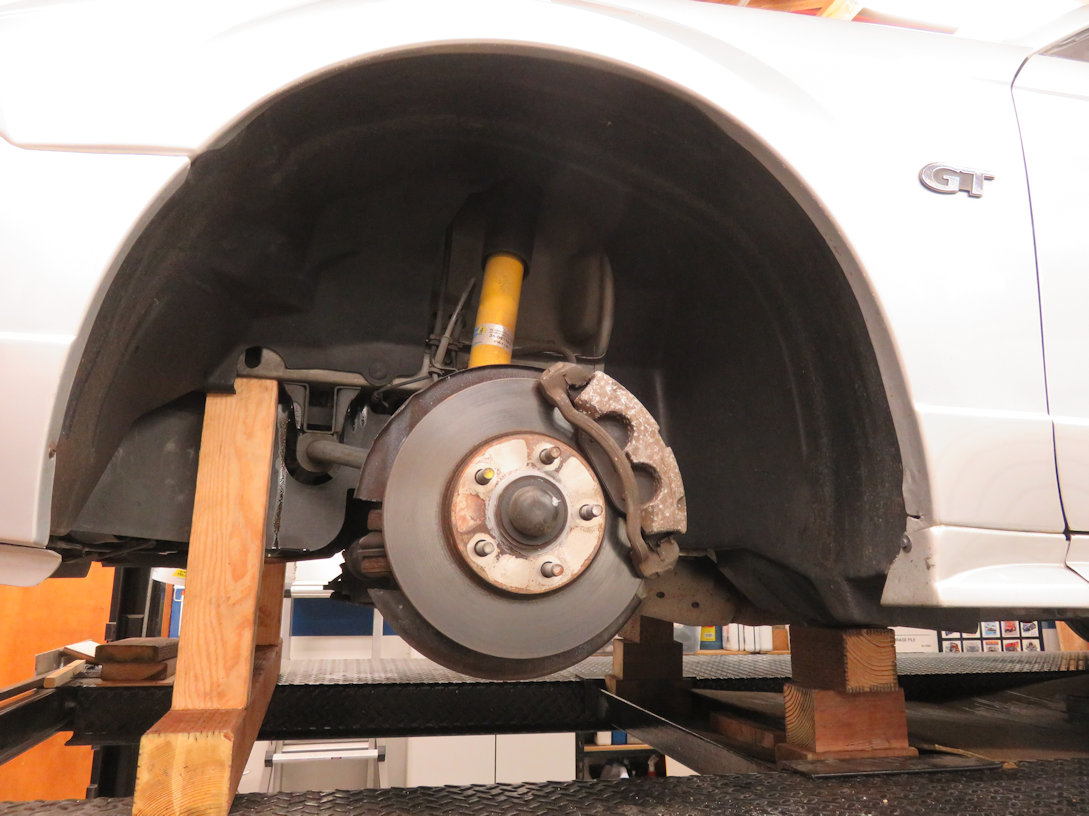
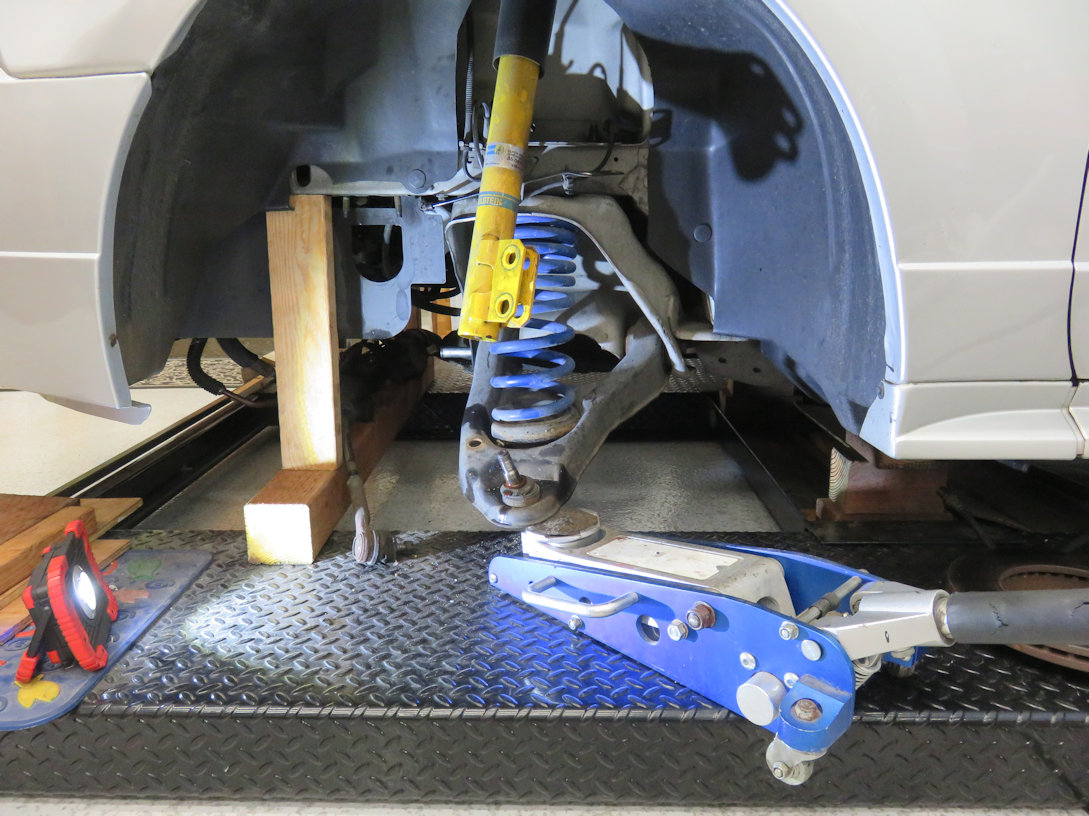
I installed .75 forward offset LCA's with Delrin bushings and all four corners are getting new Koni SA coil-over shock/spring setups. Plan to start is 400# in front and 250# rear. The remainder of items to install are the stock steering shaft with new MM bushings, sway bar and new bigger brakes.
I knew when I purchased this car that one of the necessities is getting bigger brakes. The stock GT brakes are o.k. for street, but not for any type of hard driving or track events, which is why I bought this in the first place. I also knew that brake pads were a major part of that change. I had been doing my research on the best way to upgrade to the Cobra/Bullitt/Mach I brakes and decided to get parts from American Muscle, Ebay and Summit Racing. Along with those I replaced ALL the flex lines with stainless steel flex brake lines.
Changing to the Cobra brakes isn't much more than just taking the old ones off and installing the new parts. You will take it all the way down to the spindle and use new mounting brackets for both front and rear sets. I did remove (and not replace) the dust backing plates.
I'm installing Cobra/Bullitt/Mach I four wheel disc brakes all around, combined with Carbotech XP10 front and XP8 rear pads. I run this setup on the Cobra and love the way it feels. I know this car is heavier but have driven one identical to this and feel good about my choice. The pad I.D. is: CT412-XP10 in front and CT627-XP8 in the rear and I purchased them from KNS Brakes in North Carolina, but you can find them other places that are Carbotech Dealers.