| NEW |
| Coyote Swap |
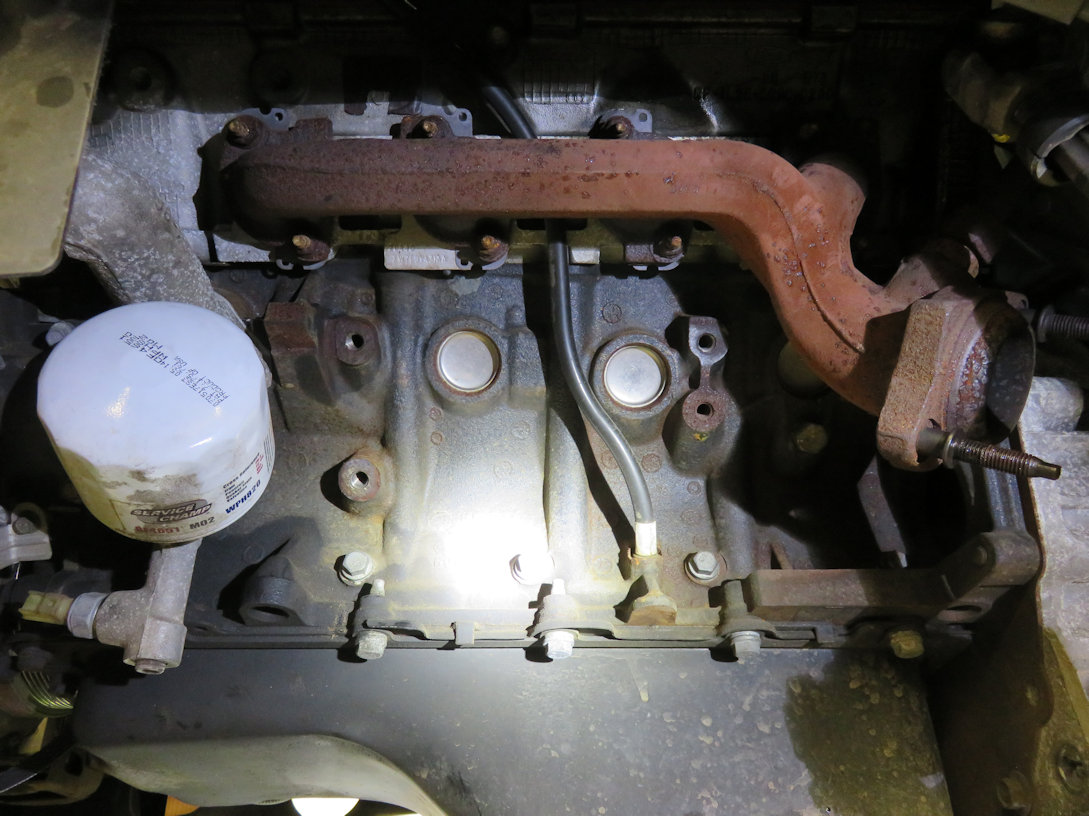
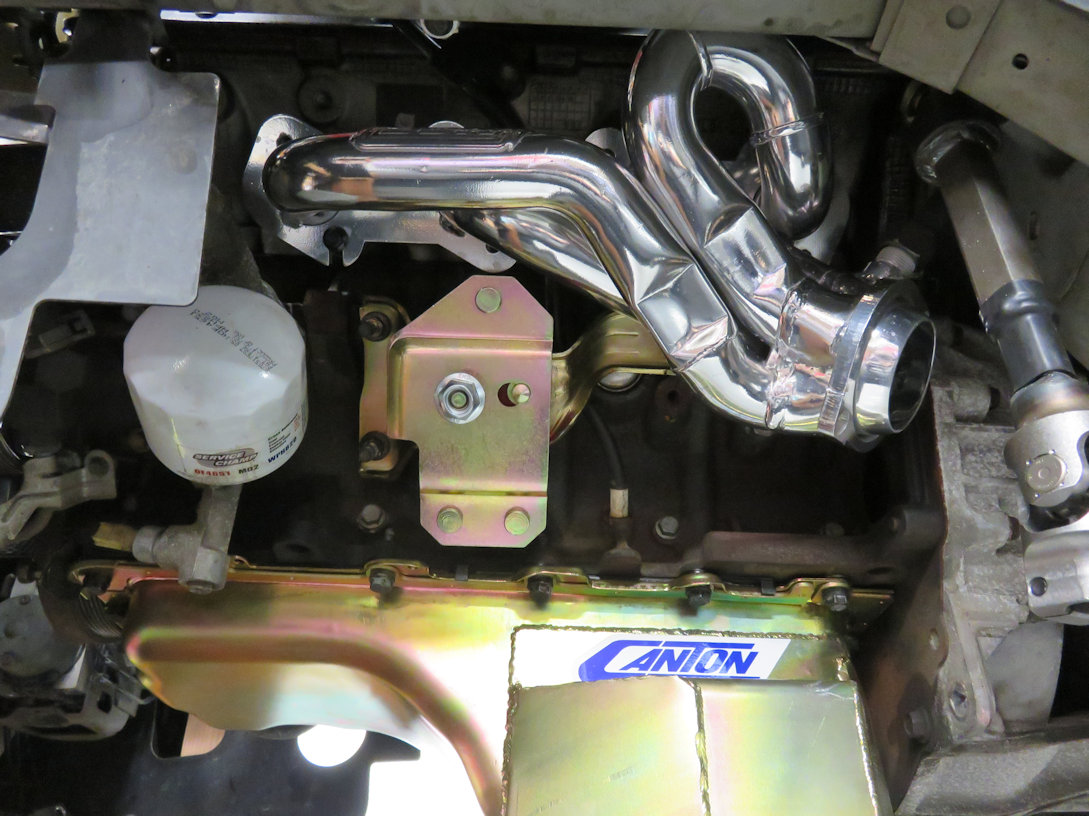
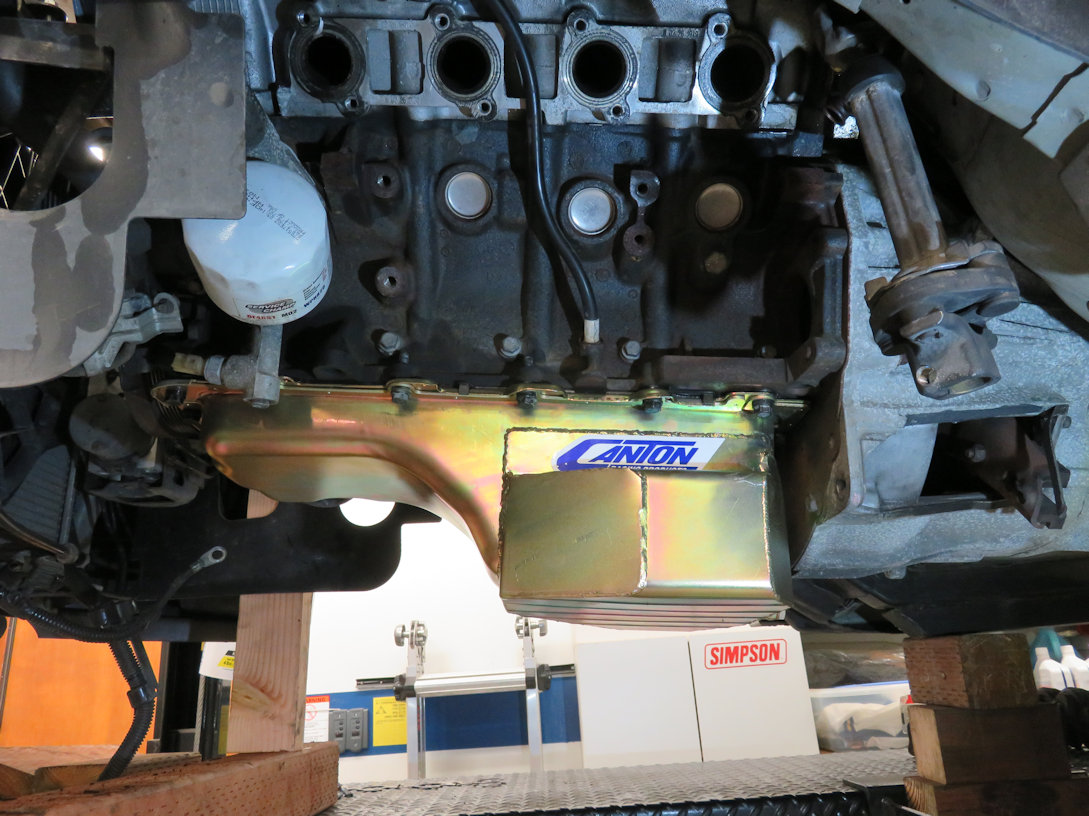
The engine is staying stock for now. I will be putting a larger throttle body and cold air intake (CAI) and normal tune, but nothing else special. While I had the "K" member off, I did install new Energy Suspension motor mounts and new Canton 7qt. road race pan along with BBK ceramic coated shorty headers.
The BBK headers turned into quite a project. Nothing you'd want to attempt on a completed car because you'd run into a whole new vocabulary of words and phrases you never knew existed. They were a pain even with the "K" member and suspension out of the way. I couldn't imagine doing it on a completed engine knowing what I know now. One bolt on the right side took me 1/2 hour just to tighten enough to get the box end of the wrench on! However, they are on!! I also installed Percy's exhaust gaskets. I like these and have never had an issue with leakage on my other cars. It's a good thing I did this now because doing it on a completed engine from the top would've been a total disaster. You need to remove ALL the studs from the old exhaust and use the bolts supplied with the headers. Next is trying to get the bolts started. BBK did slot a few of the flange bolt areas so it was easy to get them in position. I also installed a set of Percy exhaust gaskets to make sure it sealed nicely. The driver side wasn't too bad to tighten up the exhaust and I thought it was the hard side (I did this one first). Little did I know the passenger side was worse!
Becasue the exhaust tubes are semi-equal, they are in the way of some areas. I did have to put a stud in the #2 lower hole because you'd never get a bolt started in it. The top hole for #2 was the bitch. You MUST start this bolt while installing the header first, then start the lower ones on #3 and #4 because you'd never get those in afterward. All this while holding the header loose. The #2 upper bolt took me 1/2 hour to tighten. I had to lower the car and take the intake hose off to access it, then using the open end side of the wrench, make small turns rotating the wrench each partial turn. You can't get a closed end on the bolt head from the start. Once there's clearance, the closed end finished up the job. I'm thinking of buying a 10mm wrench and making it "special" for that one bolt! Trying to do this from the top on a complete engine would be futile to say the least.
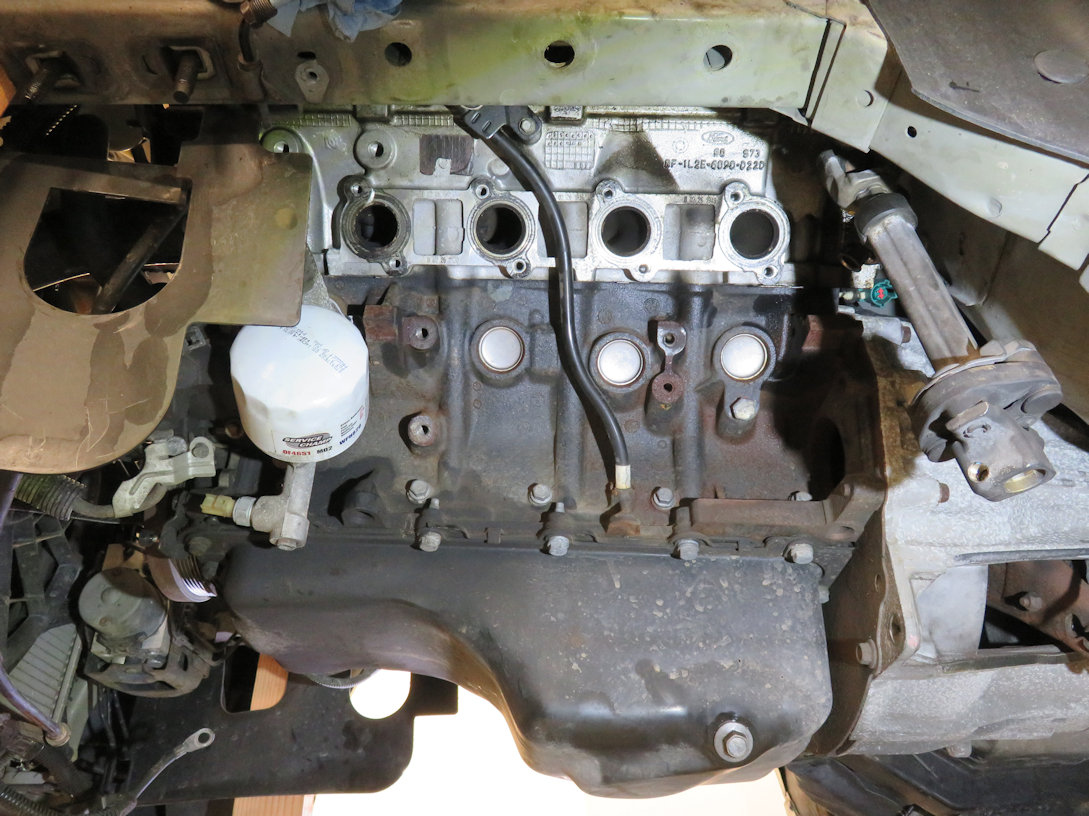
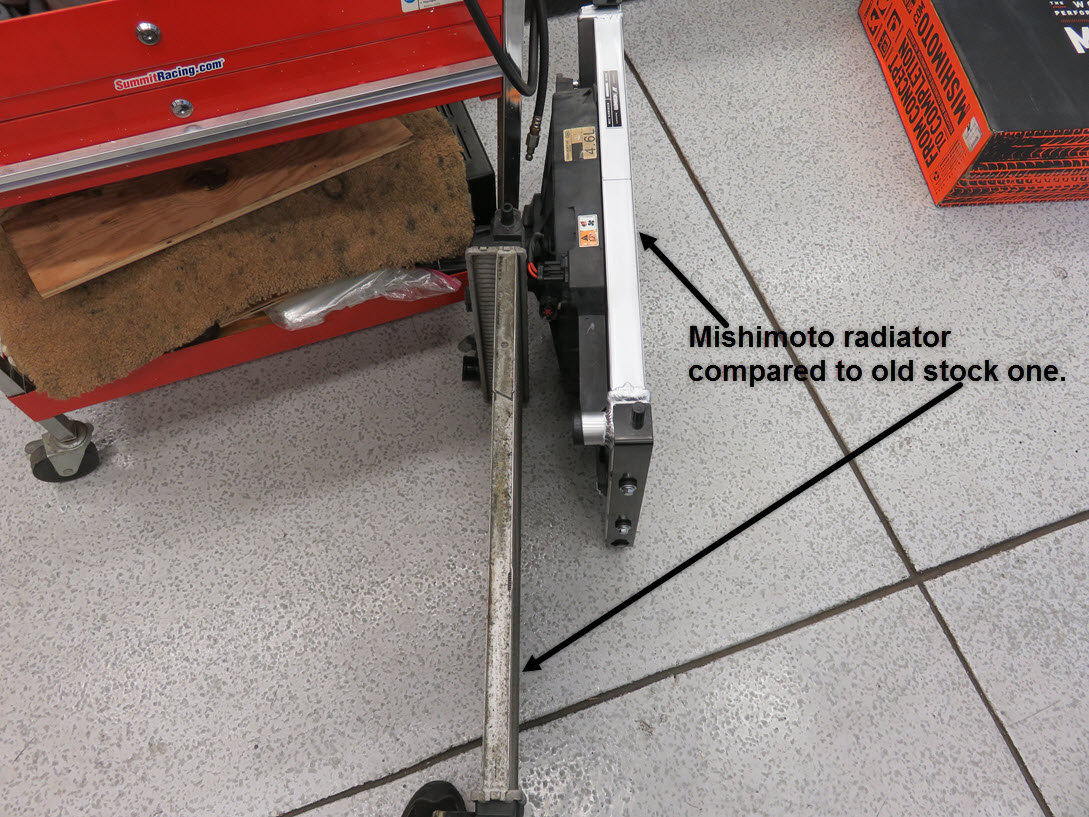
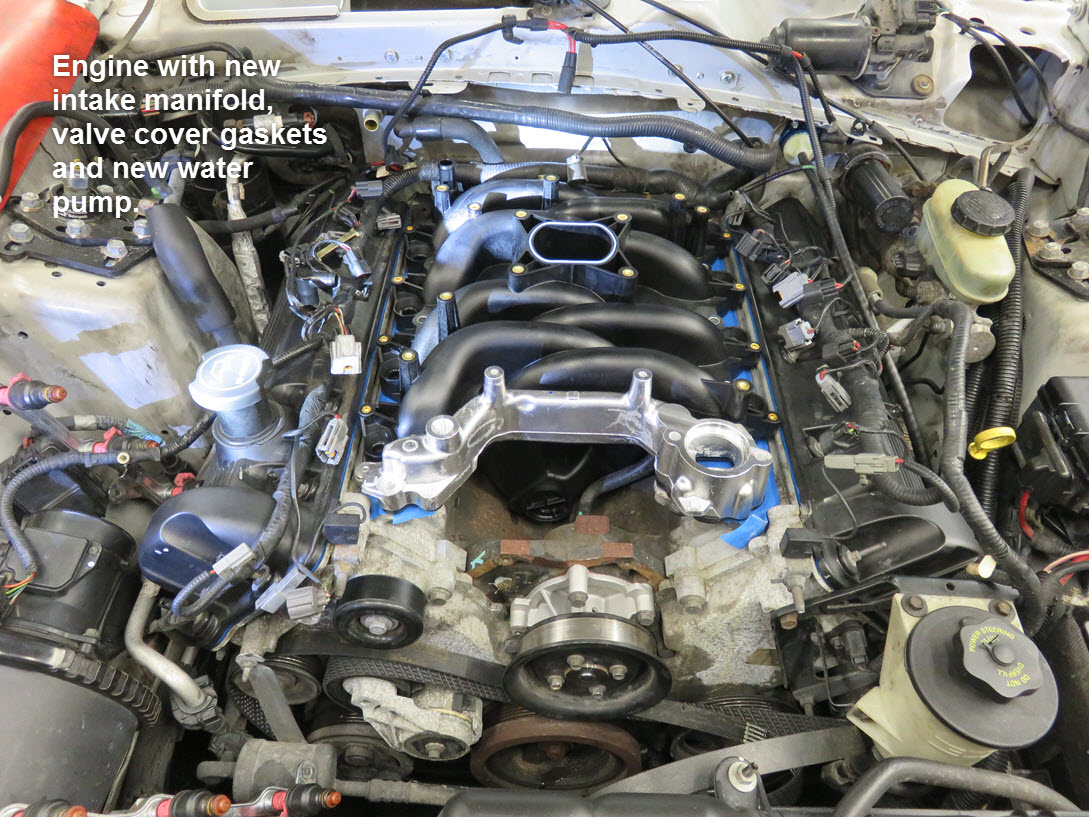
While working on the bottom I saw a small water and oil leak. Not big, but did some investigating and found the intake manifold had a small crack at the heater hose and the driver side valve cover had a small oil leak. Once back on top, I removed the intake and inspected the fuel injector "O" rings and found some bad as well as the protective cap split or missing so a new set of seals were ordered for replacement while they were out. I then removed both valve covers and replaced the gasket and grommets. I also installed a new thermostat and for good measure, replaced the water pump because of age and the fact a lot of items were already out of the way. I decided to replace the radiator (which I was going to do later on) for the same reasons and it's one more thing that'll be off my "to do" list. I installed a Mishimoto radiator and it was a bit larger although it did fit, I had to move (bend) AC lines and remove the battery and bend the PS lines just to get it in. Then it was making the bent lines fit properly to allow it all to fit nicely. Glad I did this now. Hoses are in good shape and I saw no reason to replace them at this time. System got a fresh coolant change and now should be ready to go.

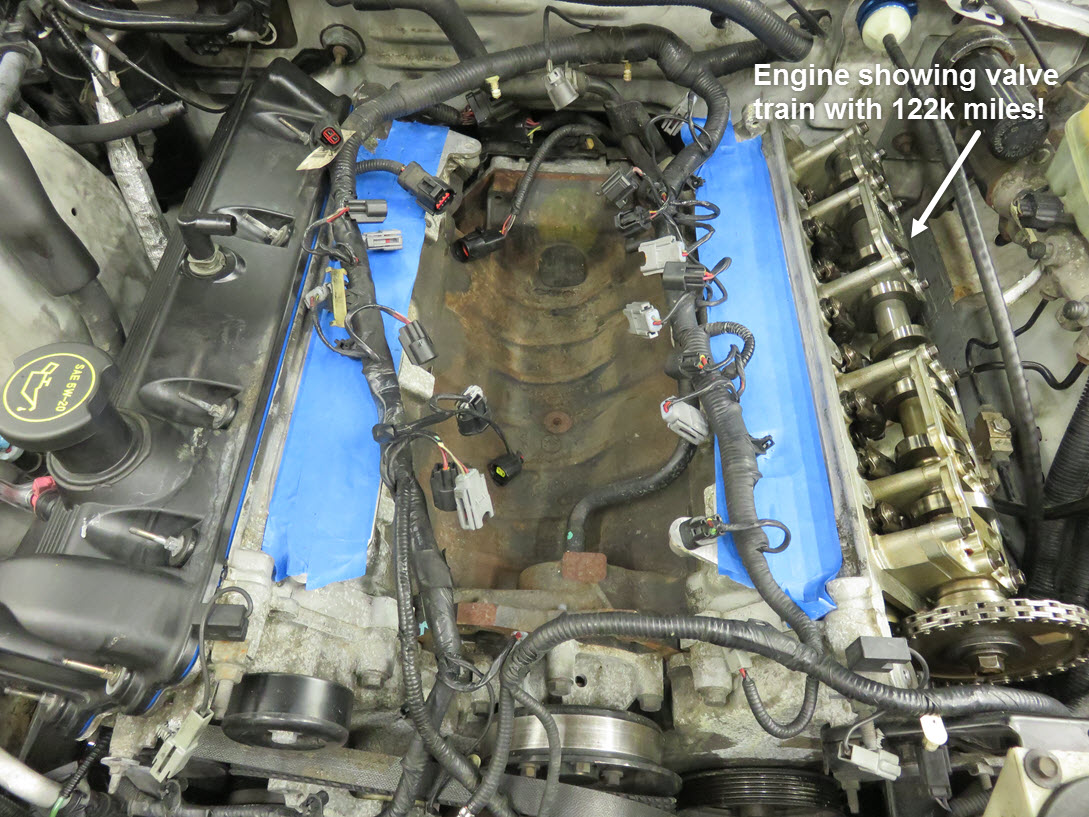
The engine received new spark plugs and MSD coils to finish off the engine work. I would say it's in the best shape since being new, other than the 122k miles it has.
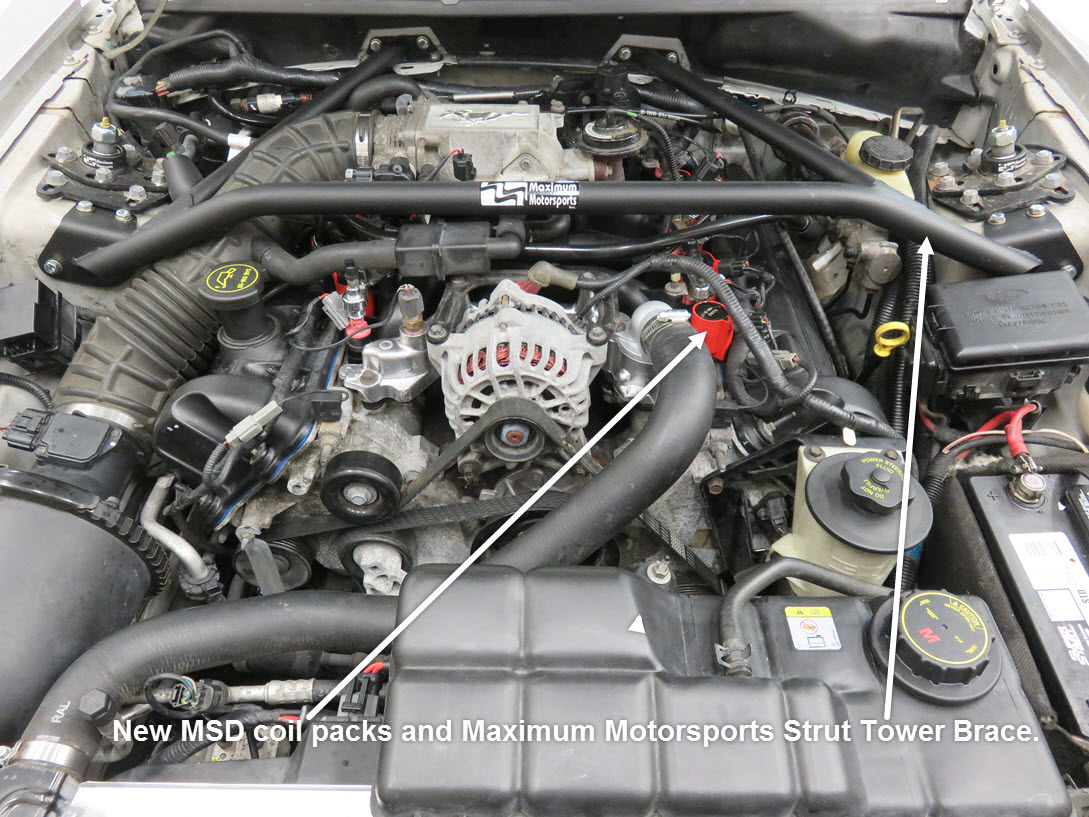
One HUGE benefit to having the top of the engine off was fitting the new Maximum Motorsports Strut Brace. Fourteen (14) 5/16" holes needed to be drilled into the body to fit the brace. However, they all can't be drilled with the brace out. You have to drill one, secure it, drill another to make sure you're on target and then keep going. Yes, it's a bit of work, and having the area easier to maneuver to complete the installation was well worth it. I did get tired of drilling holes and used two drills to keep me going. One bit change per drill doing a step up sizing per hole. Finished product says it all.
I had previously thought about installing a CAI, but after deliberation and a lot of reading, it wasn't going to be a huge advantage in horsepower "bang for the buck", so I'm not installing one at this time. I did however install a new Trick Flow 75mm plenum and BBK 70mm throttle body, which seemed to do a little just by my seat of pants dyno (which is useless without numbers). Overall, I'm happy at this time and trying to fit a CAI under my newly installed strut tower brace is impossible without doing some cutting a re-welding of the support, so I'll decide and if it gets done, it'll be some downtime over winter.
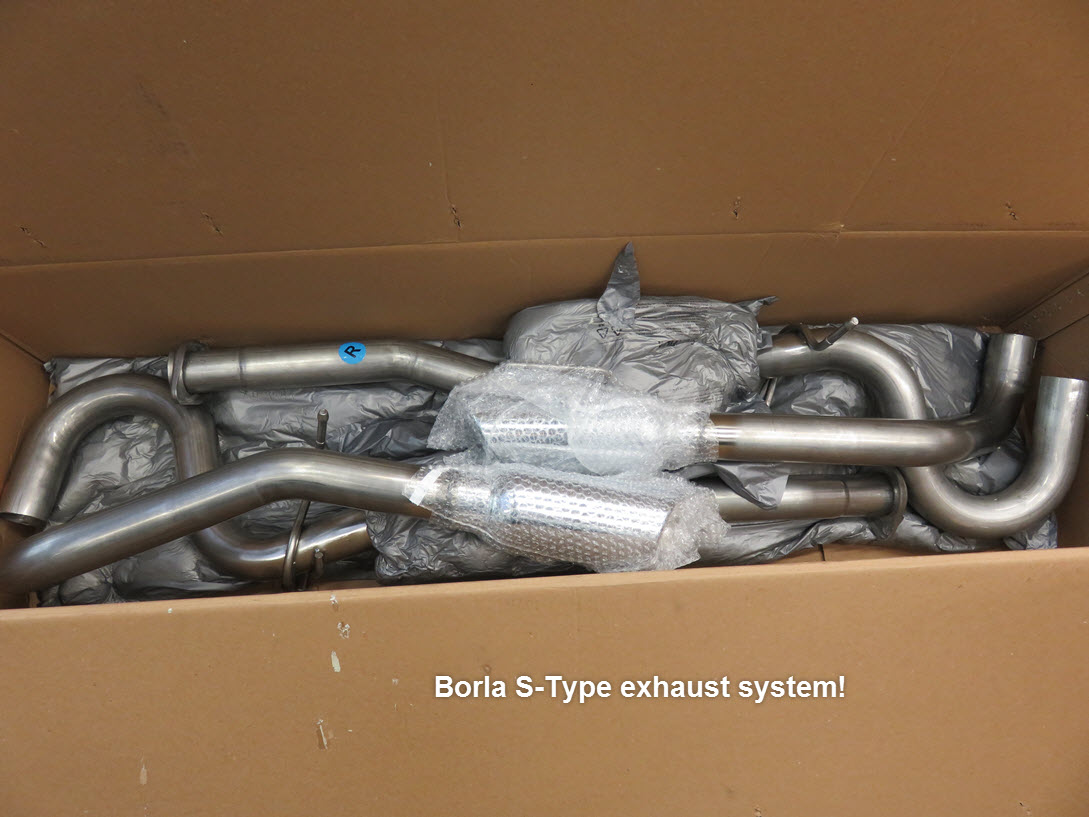
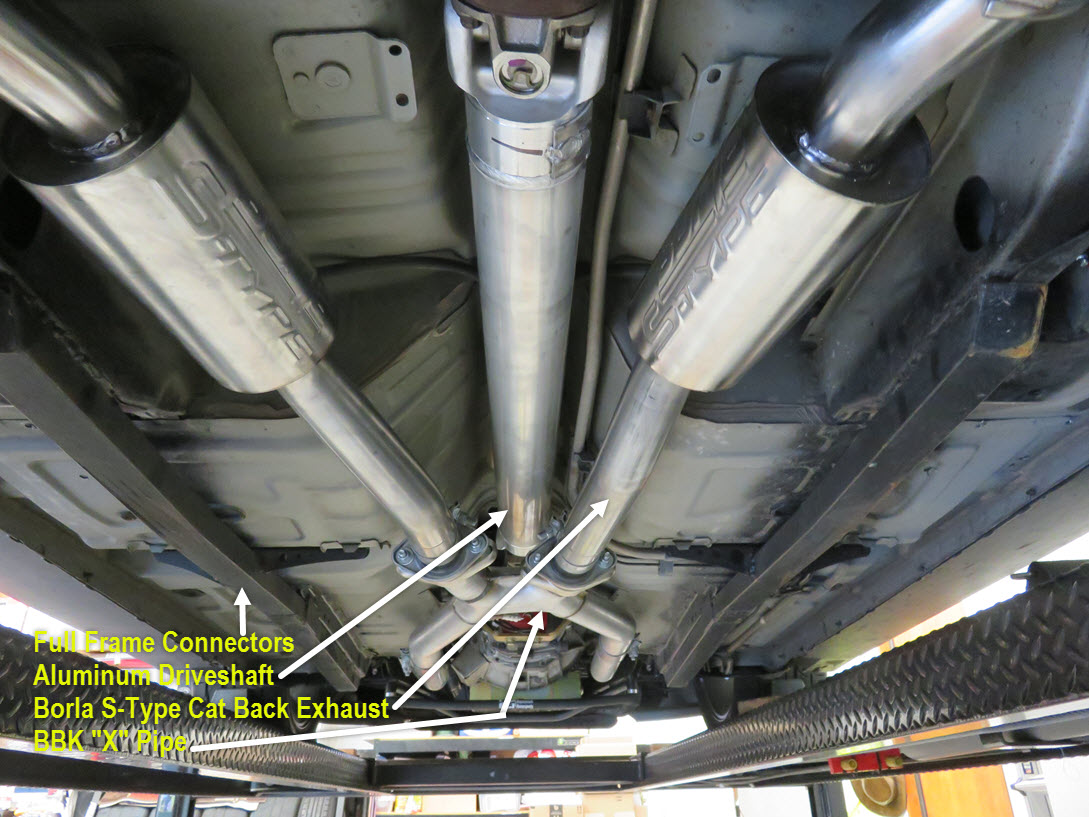
Underneath was the installation of a BBK "X" pipe and new Borla S-Type cat-back exhaust system. I needed to take it to a muffler shop to have the right rear tail pipe section installed due to interference with the panard bar bracket. While the car was getting aligned and cross weighted at Custom Alignment in Mountain View, I had them take it to Meineke Muffler in Redwood City to fit the exhaust. Final product looked and sounded great. I also installed a new Ford Racing Products aluminum driveshaft.
Well, winter didn't come early enough and I needed to change the gearing in the rear end, so I decided to go ahead with my CAI install. I purchased an Air Raid system just because I like it. I'm not sure one is that much better than another but I wanted a black intake and needed it to be CARB leagal. Plus I opted not to put the entire intake in the fender well area. The Air Raid uses both air from the front of the car under the hood (box is sealed to bottom of hood for colder air) plus it has an intake opening directly to the inner fender area. Now I've pretty much gone as far as I can without doing something really drastic, so it'll stop at this time.
I also installed a new 70mm BBK throttle body and 75mm Trick Flow plenum to help with some air flow. Is it enough? Not sure but more air is better. Next would be a Coyote. Hhhmmm??
I did have to remove the Maximum Motorsports strut tower brace and cut-off all the welds on the cross bar. I also removed the right side firewall bar completely because it interfered with the CAI inlet tube. It was just too low. I ended up raising the cross bar about 1" evenly keeping it level across the towers. Then made a new right side firewall support bar to miss the CAI. Everything was tack welded in place to make sure it would fit and then removed for final welding, cleaning up and then having the brace Powder Coated again so it looked good.
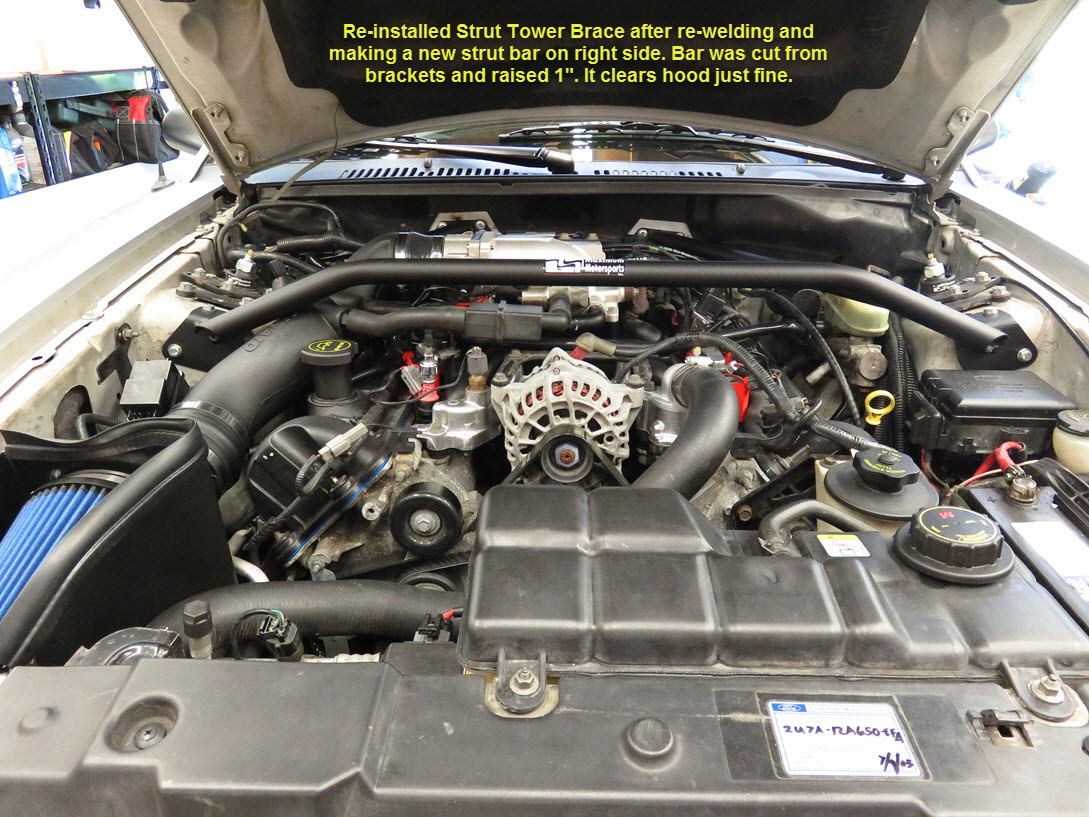
Maximum Motorsports Strut Tower re-installed after reconfiguring bars due to addition of Air Raid CAI, BBK throttle body and Trick Flow plenum.
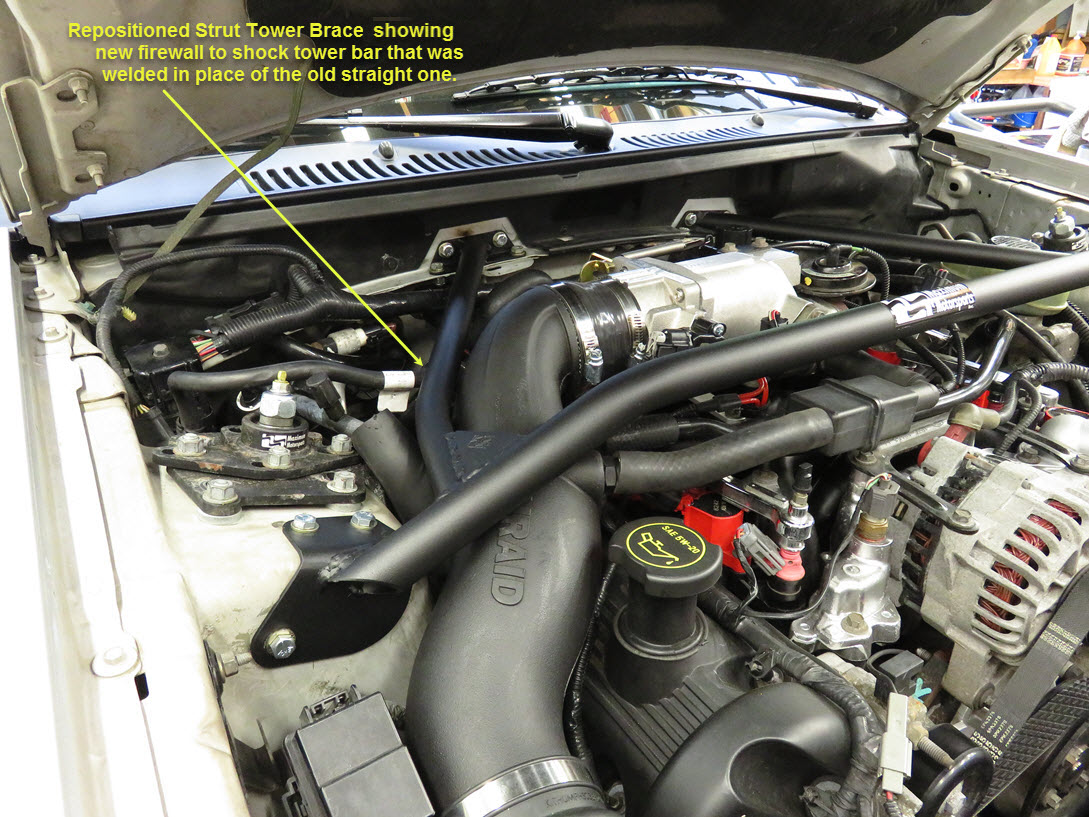
New firewall strut bar made to clear CAI.
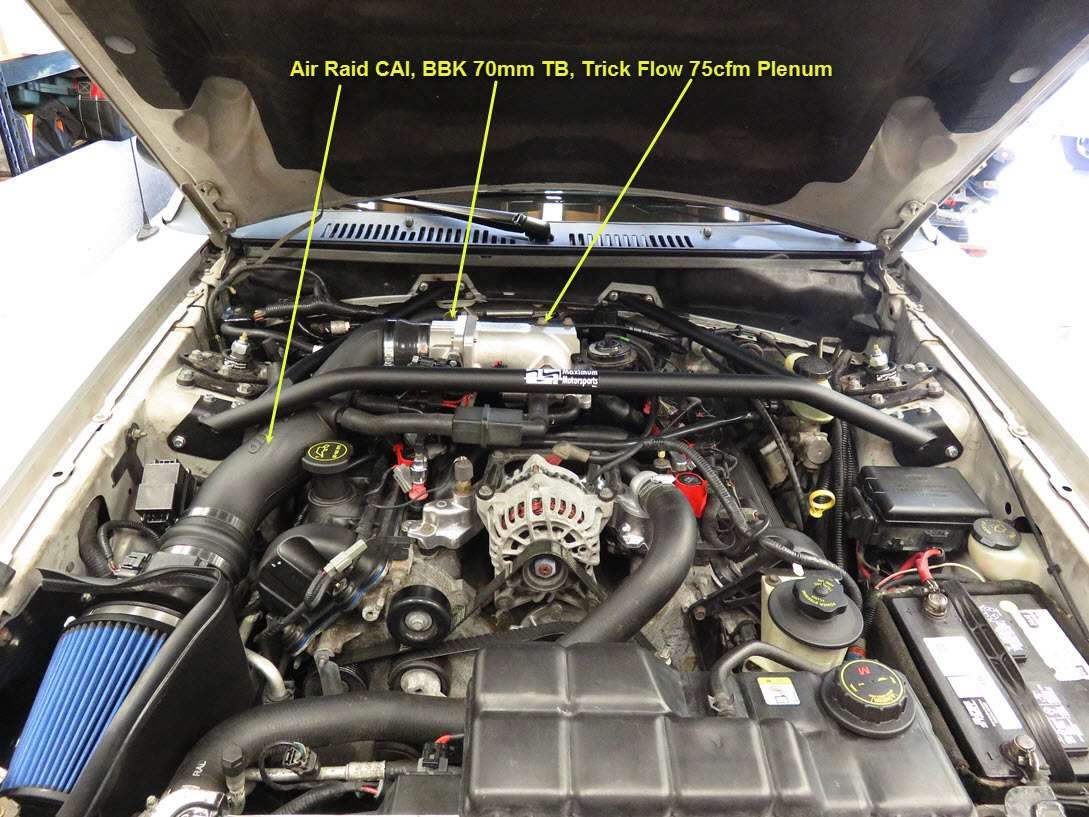
Final installation showing all components. Notice the air intake box has a rubber seal that seals to the bottom of the hood when down. I double checked and it does seal to allow "mostly" cold air to enter from over the headlight area. It also has a short tube to the inner fender area for air intake. Wouldn't this look better with a Coyote?
Installed a set of Steeda Underdrive Pulleys to see if they do what everyone says, but I'm sure I'll not notice any big performance gain. At least I know the crank pulley is new and not rubber degraded over the years. My alternator pulley is not the same as what they sent so I'm waiting for their response after installing them in October 2019. Worst case scenario is to make my own spacer for the alternator shaft and install their pulley.

Steeda and Stock 4.6 pulleys showing difference.
Update: November 6, 2019
Finally got the correct pulley today! Only took them 3 tries, but at least it's correct. After dealing with them on the issue I found out when you complain, it goes to a certain department, which has NO control over the actual re-ordering of the part to send out. That is just someone (my opinion) going to the shelf and pulling the item and shipping. So the person you deal with is not necessarily the one who's going to correct it. However, after my persistence, I got the correct part.
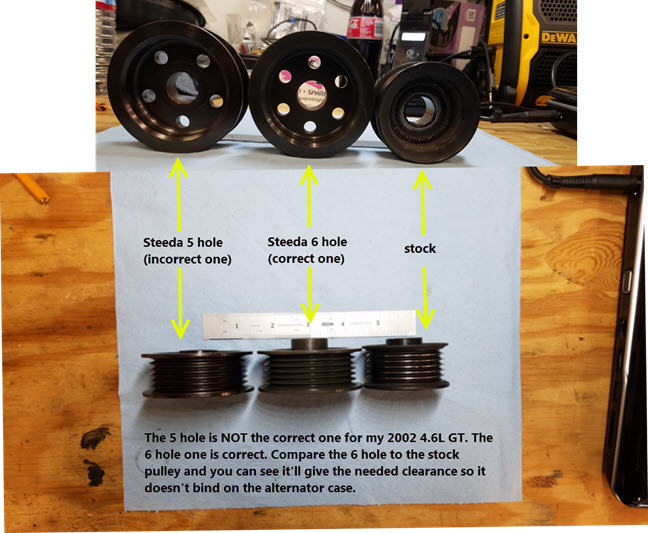
Steeda 5 & 6 hole pulleys and stock 4.6 pulley showing difference.