
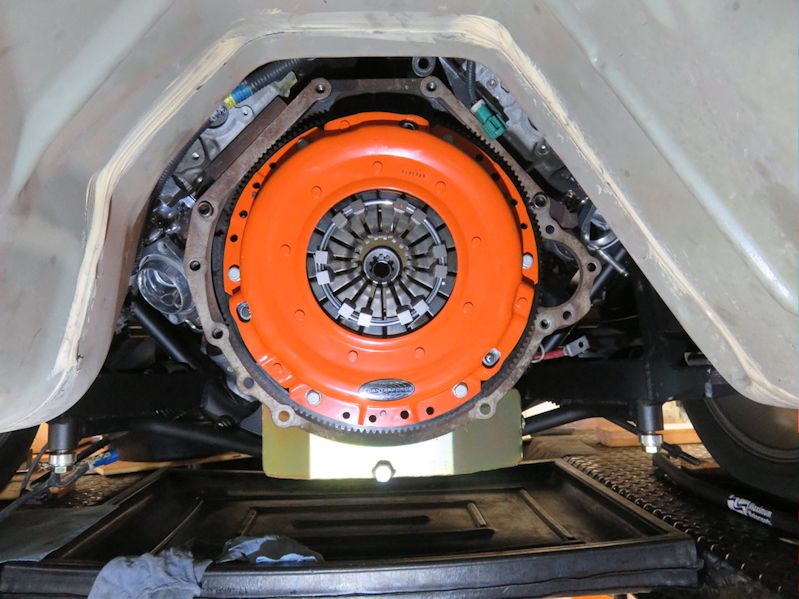
ACT flywheel & Centerforce Dual Friction clutch.
| NEW |
| Clutch Pedal Mod | Tremec TKX |
Transmission & Clutch
With the mileage on the car, 123k+, I knew I was going to at minimum, check the clutch. I was pretty sure it was going to be changed just due to the harshness of the pedal feel along with the chatter it had. I have been always prone to the Centerforce Dual Friction Clutch so that was going in if/when I needed.
The time for replacemnet was as I thought, just going to do it. After removing the transmission and viewing the old (maybe original) clutch, I'm glad I did. I also replaced the flywheel with an ACT steel flywheel. They are a better fit than aluminum with just a bit more weight but all steel construction. I've used these on several other cars I've worked on and/or owned and never had a problem. A new pilot and throwout bearing were installed as well as lubing the shift fork/ball assembly. A few steps are taken when installing the Centerforce to insure proper distance from clutch fork to flywheel and I didn't need to use any type of shim or adjustment to insure proper fit.
ACT flywheel & Centerforce Dual Friction clutch.
Removing the transmission isn't a big deal for me because I have a lift and transmission jack. However, the two top bolts are a PITA to remove and you will most likely need a 1/2" air gun and extension with a impact wobble socket to get them off. They were TIGHT! The rest is fairly easy, remove the shifter and console related area, driveline and exhaust, plus any wires etc. in the way and then support the trans and remove the rear crossmember. I installed new Suspension Energy mounts on re-installation.
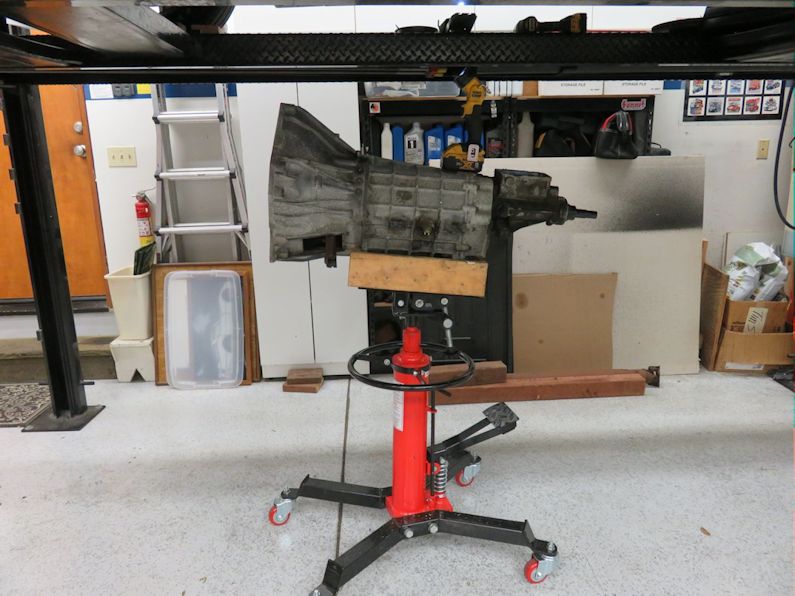
Transmission pulled on jack.
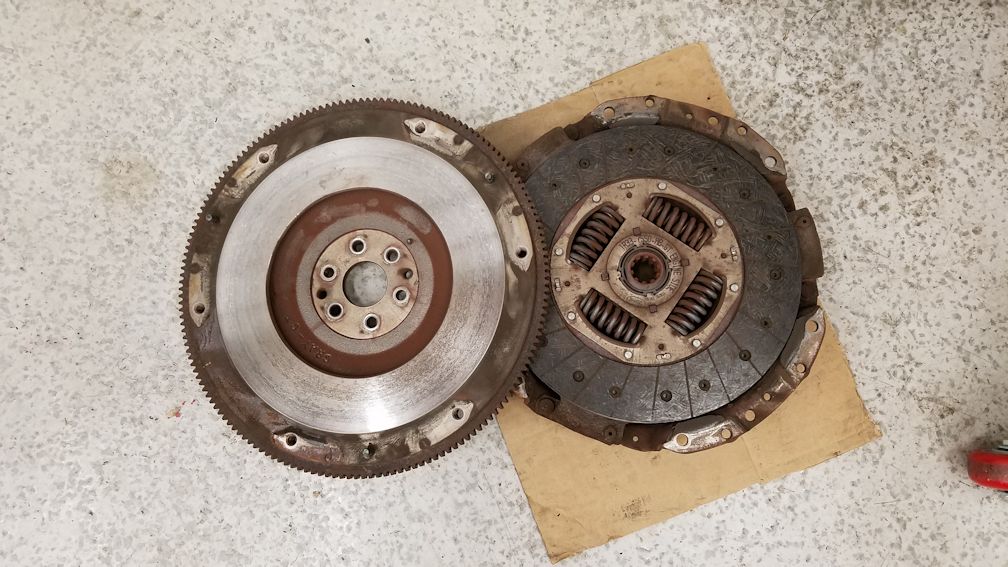
Old original clutch and flywheel.
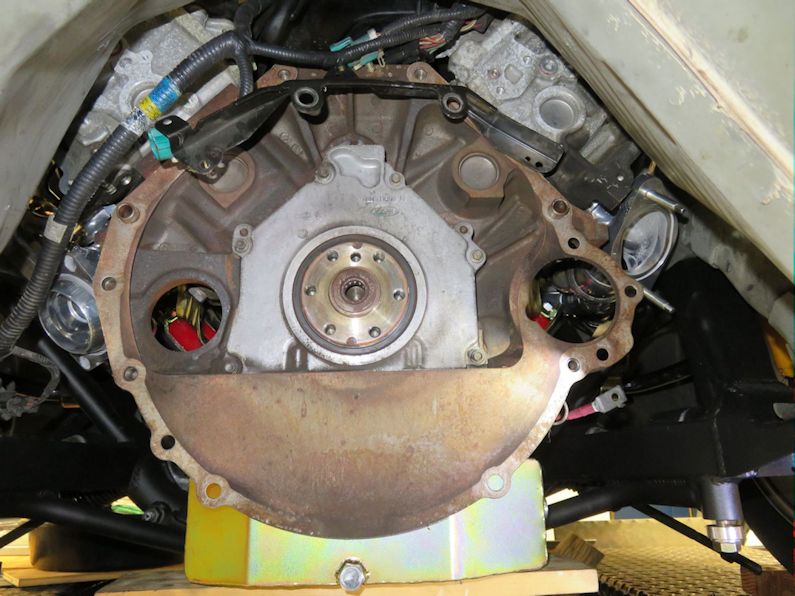
Pre install of new flywheel and clutch. New pilot bearing will be installed.
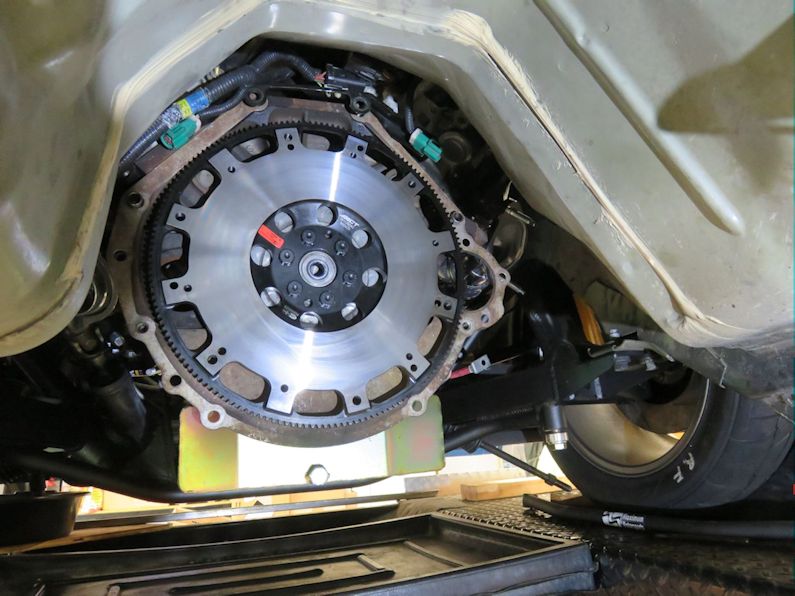
ACT flywheel installed with new bolts. New pilot bearing installed.
February 2023
Pedal Placement
After driving for awhile now, I find the clutch pedal just a little "long" for my taste. Way too much pedal travel! So, I've decided to shorten the travel about 1 1/2" to allow me to have better feel on the release. I could always just add a pedal stop on the pedal box, but I like to things a little different. I have a habit of doing a full travel, no matter what, so it really doesn't make sense to put a stop, when in reality the pedal is set too high to begin with. A lot of leg movement is needed to get to the pedal and why put out that effort when shortening the throw is much easier. Moving the pedal toward the firewall is the most obvious thing to do and I'll still have full travel and more. The geometry of the cable/quadrant isn't going to change, just the pedal.
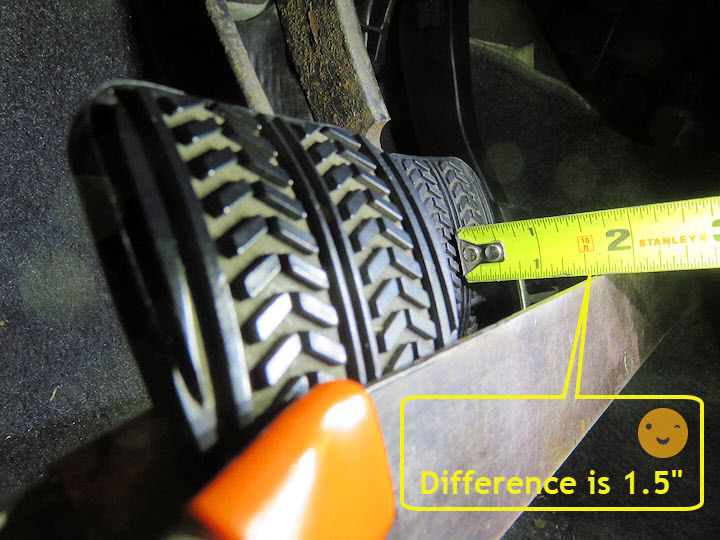
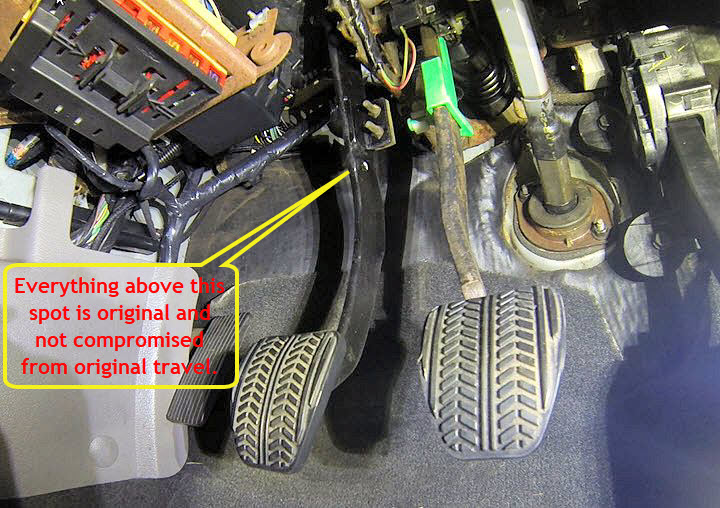
As you can see in the pictures, it sits about 1 1/2" further out than the brake pedal does. Meaning, you must raise your leg that much further and press that much longer to release the clutch. However, you can also "short push" the pedal to get the same thing. My problem is, why waste the leg movement, so I'm shortening the effort.
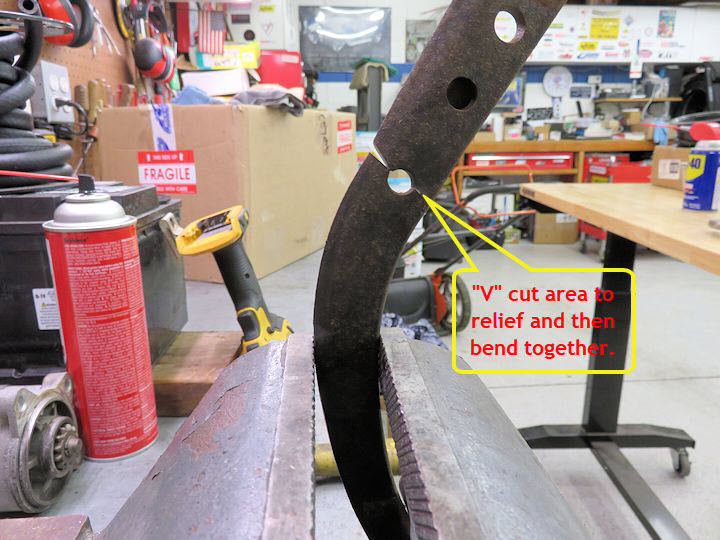
My plan is to cut the pedal arm just below the factory stop (there's a hole in the arm) on the front side of the hole and bend the arm toward the front to close the gap and see where it lays. If all is good, I'll tack it in place and try it out. Once satisfied, I'll remove the pedal and do a good weld and re-install. Easy peasy!
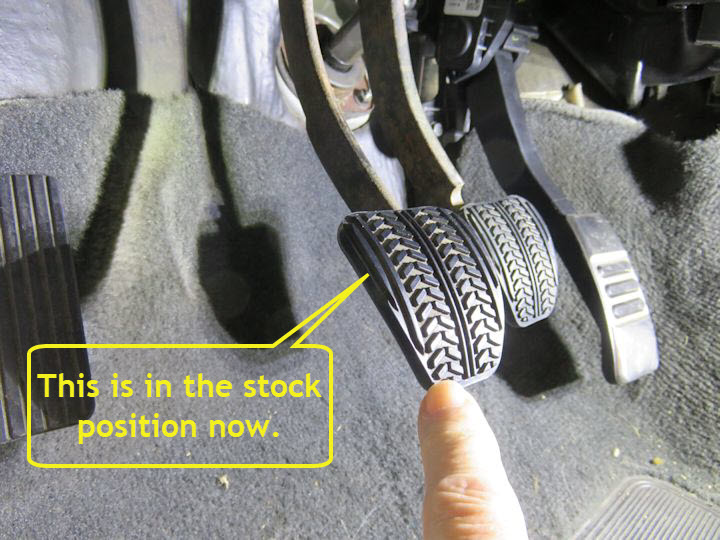
Stock location in relation to brake pedal.
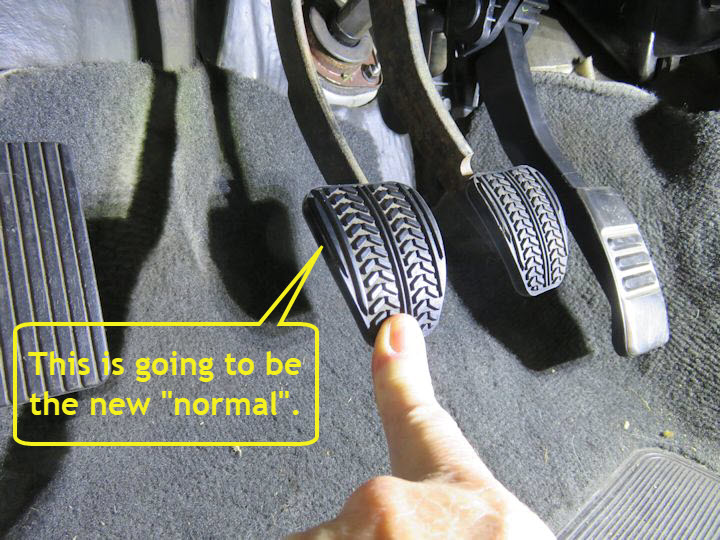
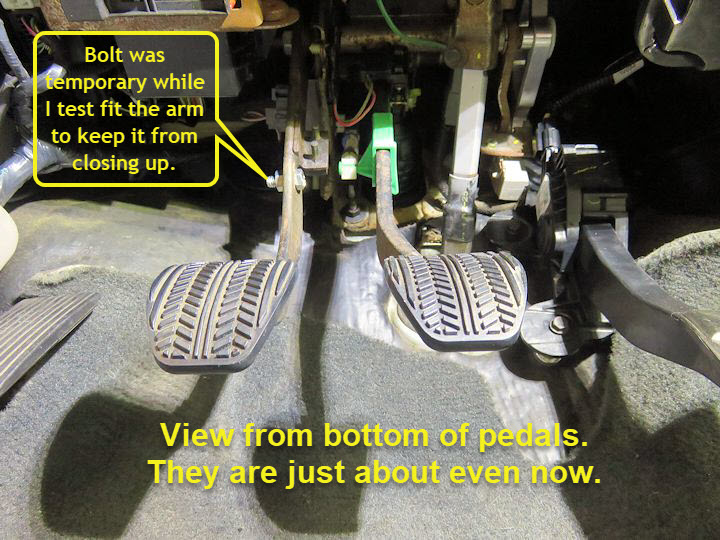
Showing the new location of clutch pedal.
Got busy doing the pedal mod. I didn't remove the lower dash trim assy. and although a tight fit under the dash, I found it not really necessary to remove. First I just unbolted the pedal (18mm hex head nut, and best way to remove is a ratcheting box wrench) and remove it along with the N/S switch to remove the small clip retainer for the switch. The N/S switch is buried up there so getting to it was a PITA. Use a 7mm socket to remove the single bolt and then un-clip the plug. Once you have that down, remove the "auto-slide" stop because you will most likely reposition it when done. This is easily done by just pushing the plunger down and re-clipping the stop back near the switch itself. Once it's all connected and you step on the clutch, it'll adjust by itself.
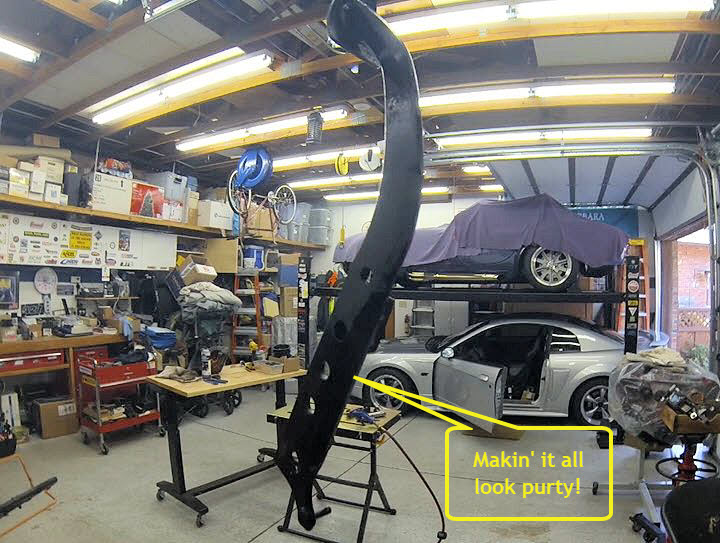
Once I had the pedal off, I made a small "V" mark where I wanted to relieve part of the pedal and then placed it in my vice to bend the arm and close up the cutout. You may have to do this a few times, so take a little off at a time and do checks on the car in between each try. I placed a small bolt in the hole where I cut just to be sure the pedal wouldn't close up more than I wanted. This was for testing the placement and position of the pedal. I then bolted the pedal back on the shaft and tested the operation. Once satisfied, it was just removing the temporary bolt/nut and welding the cut area, followed by a quick clean and paint, then placing it back on the car. Once bolted back in along with the N/S switch, just depress the pedal and the switch auto-adjusted.
Pedal releases about 1" from the floor which is much nicer than half-way up like previously. I took it out for a short test drive and once I adjust to the new release area I think it'll be just fine. No issues on shifting or any gear mesh, even in reverse, so the project was a success.


February 2024
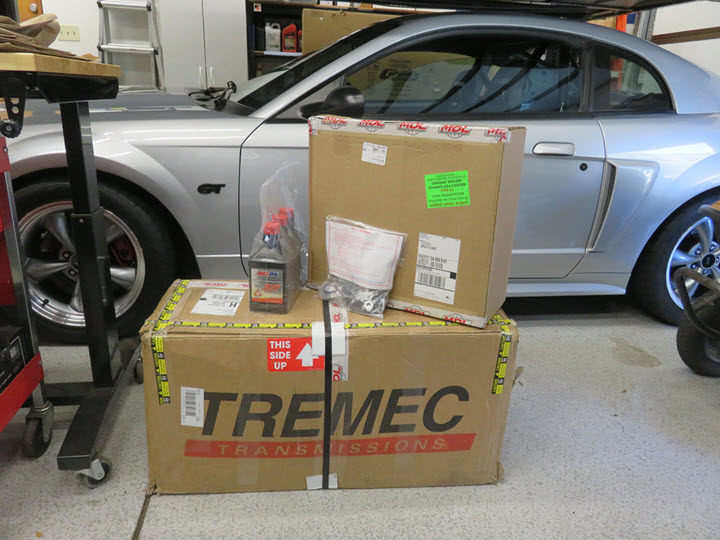
Tremec TKX Installation
After driving with the Coyote, I found that shifting the TR3650 transmission just didn't or doesn't like high RPM shifts. I found myself having a hard time either pulling it out of gear or even getting into the next gear reving at high RPM's on a track or otherwise. Now, it was time to rectify this and start the TKX replacement.
I reached out to Modern Driveline in Idaho for information and recommended items. I ordered everything needed for the swap, including a new bell housing, which my hope was being able to remove the clutch without removing the K-member and long tube headers when pulling the transmission and/or clutch. Well, the result is, I can now remove the TKX, but not the bell housing and will still have to remove all the other stuff when doing a clutch job. It's just too damn tight/impossible to do without removal, or, I have to put the stock headers back on and make a new downpipe to connect to the "H" pipe, but not ready to go to that extreme. Besides, how often do I need a clutch?
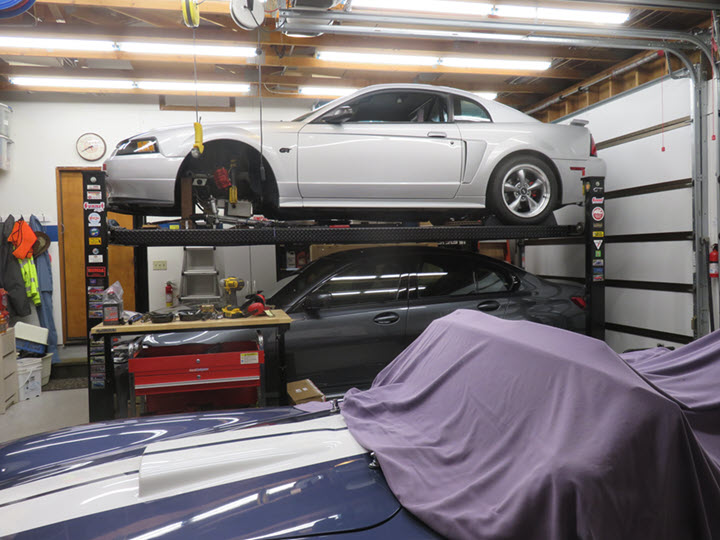
In order to start the project, the car had to be jacked up in front on blocks, the front suspension and K-member removed, both motor mounts and starter removed and then the long tube headers off, before even starting the transmission removal. Along with that any little minor connections, two grounds, clutch cable and starter connections. After that, it's on with the show.
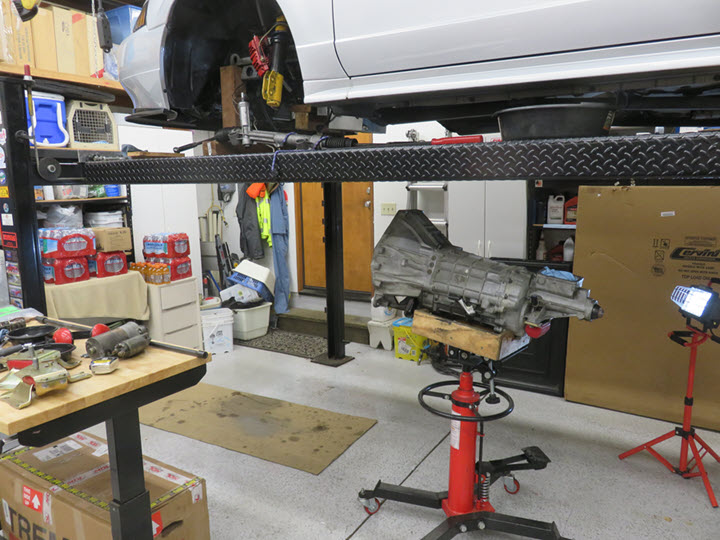
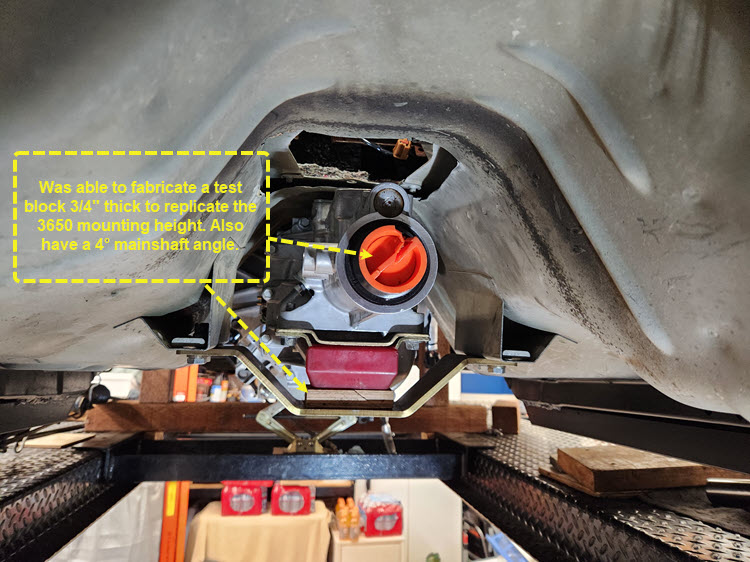
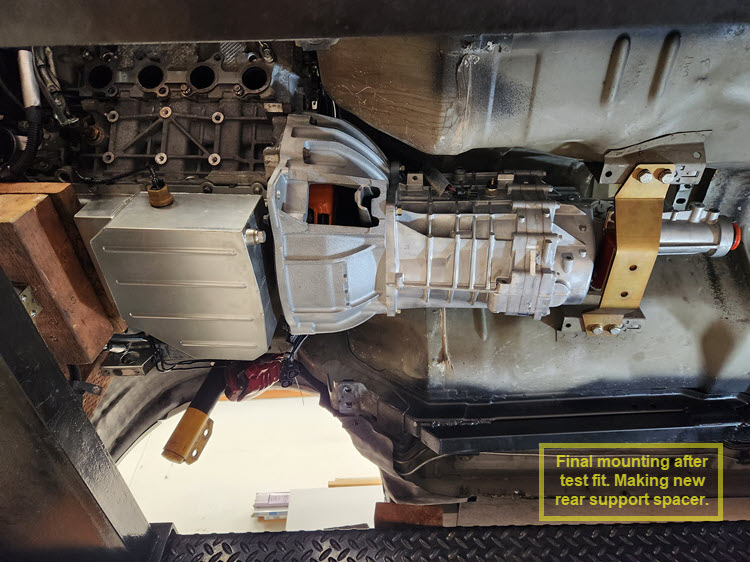
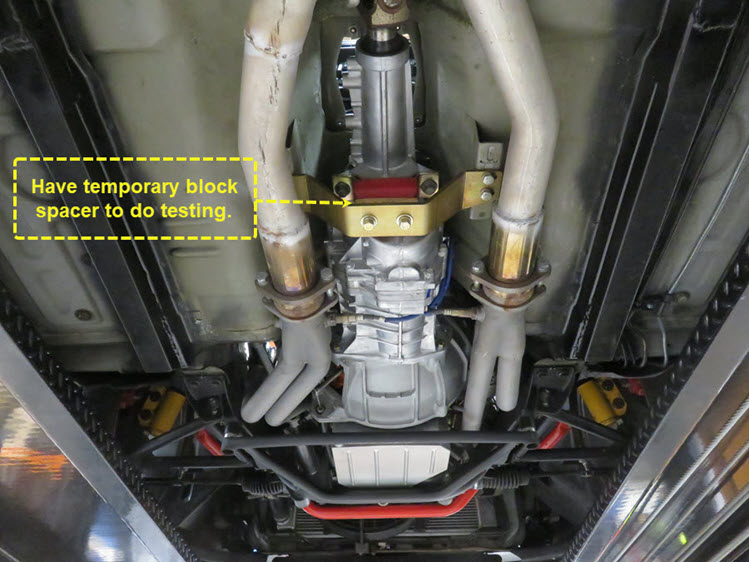
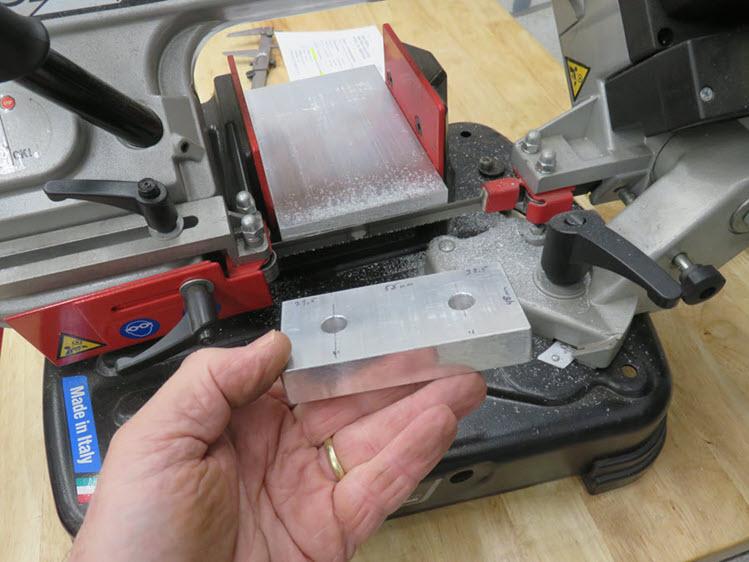
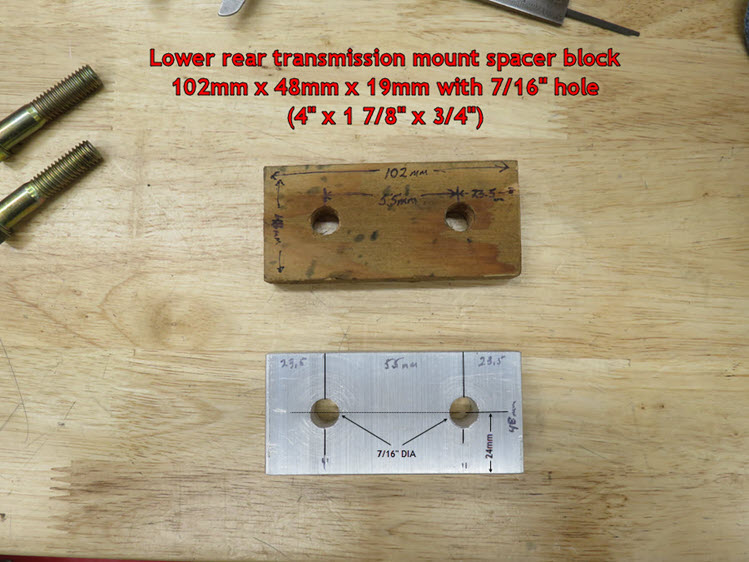
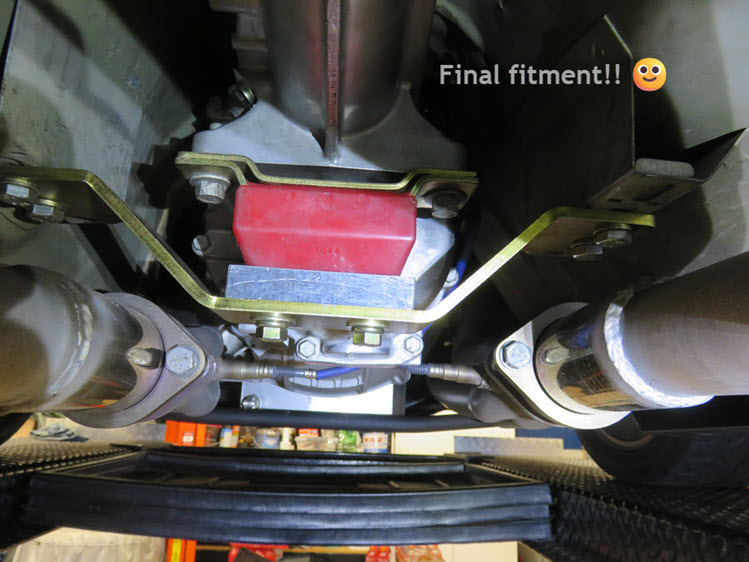
After removing the TR3650, the rest was fairly simple. Measure the distances from front of transmission (including the bell housing) on the TKX and comparing it to the dimensions of the TR3650. I found tha the TKX would be about 2" shorter from the front to the rear transmission mount, which meant the rear mount would have to be able to move forward that distance. I have a Energy Suspension mount, and the mount can be moved forward by the chassis/body mounts (they slide) and that turned out to be in my favor. Easy to do and worked out great. The distance from mainshaft C/L to flange mount surface is 3/4" shorter than the TR3650, so all I needed to do was make a new spacer to fit.
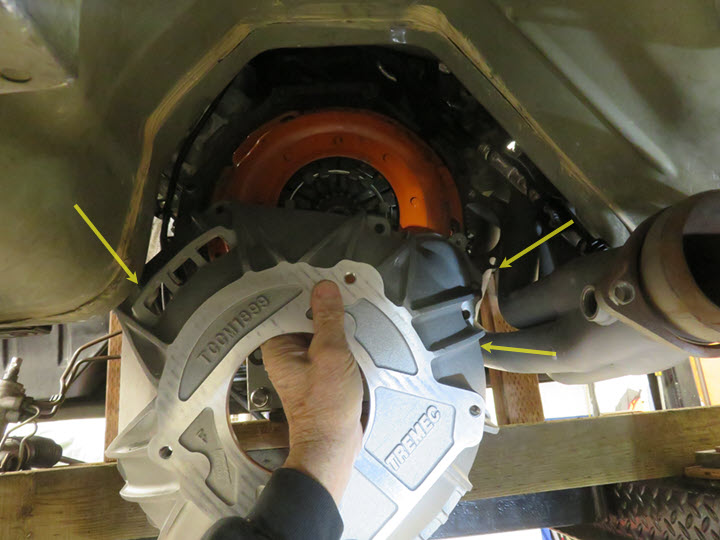
One of the main goals was to see if the bell housing could be taken off without disecting the entire front suspension and long tube headers when replacing a clutch. RESULT: it's a no-go. The headers come so close to the bell housing and body that trying to snake the housing off with the headers on was not going to happen. However, I will be able to remove the TKX because of the separate bell housing used, unlike the TR3650 with the entire transmission much like an automatic transmission, i.e. bell housing attached. Picture below shows interference areas with arrow and that's just with one header on.
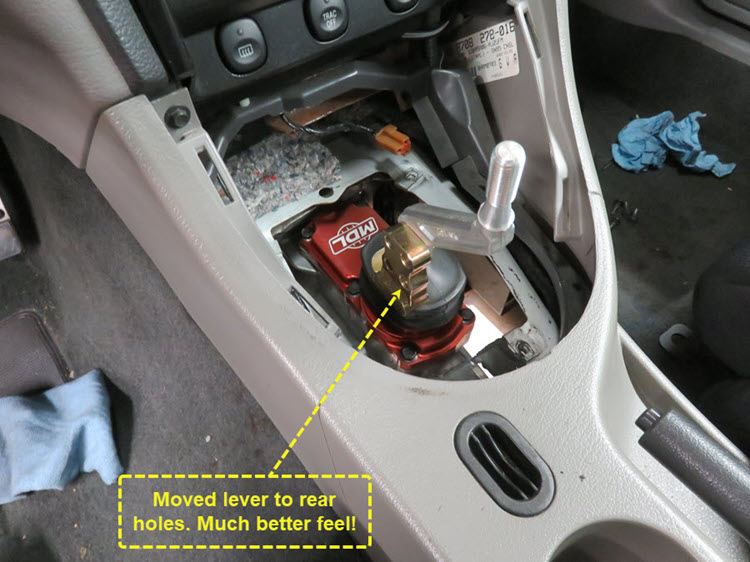
I purchased aModern Driveline shift tower as well. Nice piece that can be mounted forward or rearward on the TKX due to the double socket placement. Also, Modern Driveline has multiple configuration shift tower offsets to meet almost any need. I opted for MD-83-403-034-05F TKX Qwik-Stik that allowed me to move the lever to the left 1" and also 1.150" to the rear, which gave me a nice feel and range while driving.
 |
 |
 |
 |
 |
 |
 |
 |
 |
 |
 |
After fitting the transmission in the car and filling with Amsoil Synthetic Auto Transmission Fluid OTFQT-EA, it was just a matter of connecting all the pieces back together and doing a test drive. First it was the long tube headers, starter, motor mounts, K-member, front suspension, rack and steering column with all the little minor connections before being able to finalize the install. Yes, it sounds like a lot and it is a lot, but I can't see another way of doing it just yet. I'd still rather do it this way than to pull the engine, which would mean a lot more effort to do the same job.
Getting it back on the road and giving it a good test was very satisfactory. It shifts so much smoother than the TR3650 and very close to what a T5 feels like.
If you have needs for your Tremec transmission or other transmission related questions, I'd reach out to Modern Driveline and see if they can help. I'm sure they'll be able to get you going straight again!
I have a full start to finish installation process on my YouTube page.