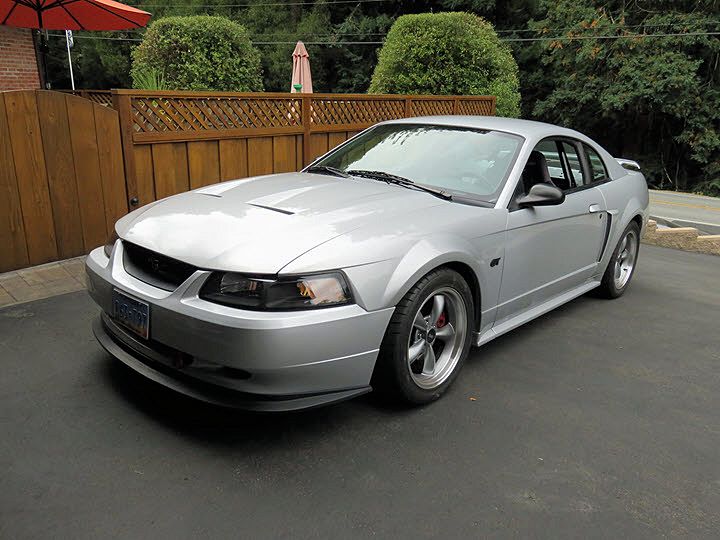
Side shot with street wheels/tires.
| Roll Bar Installation | Tow Hook Fabrication | Dash Gauge Overlay | New Extractor Hood |
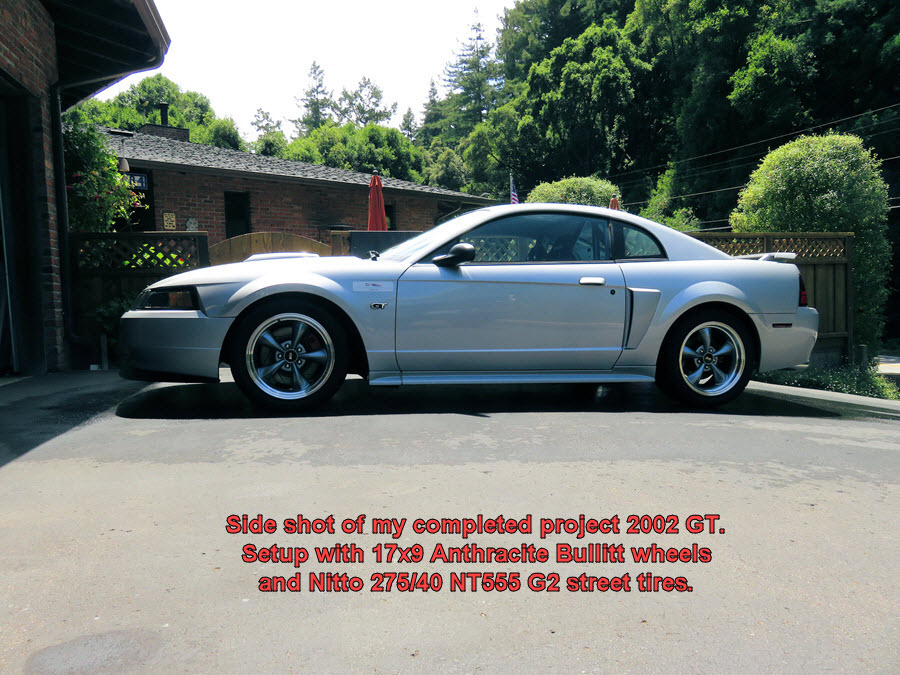
Side shot with street wheels/tires.
Roll Bar
One item I knew I was installing was a roll bar. I plan on doing a lot of track days so this was not an option to leave out. Again, I purchased the bar from Maximum Motorsports and their instructions and craftsmanship were excellent. Key factor is to take your time and make sure you install it correctly. Measure three times to install once! You can never be too sure. It was a bit awkward installing it by myself, but when it came time to fit for good after it was weleded up and powder coated, I had a buddy give me a hand installing it and made things much easier lining all my drilled bolt holes up. Final fit was perfect.
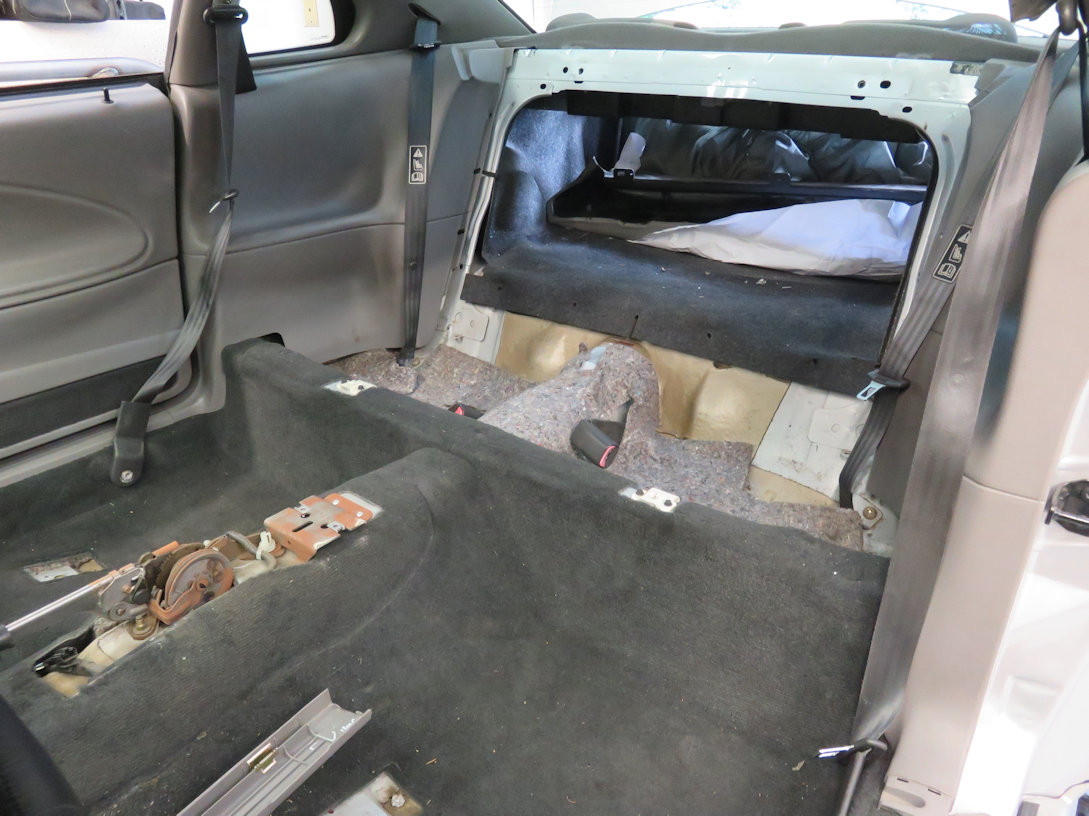
Gut rear seat and trim for roll bar install.
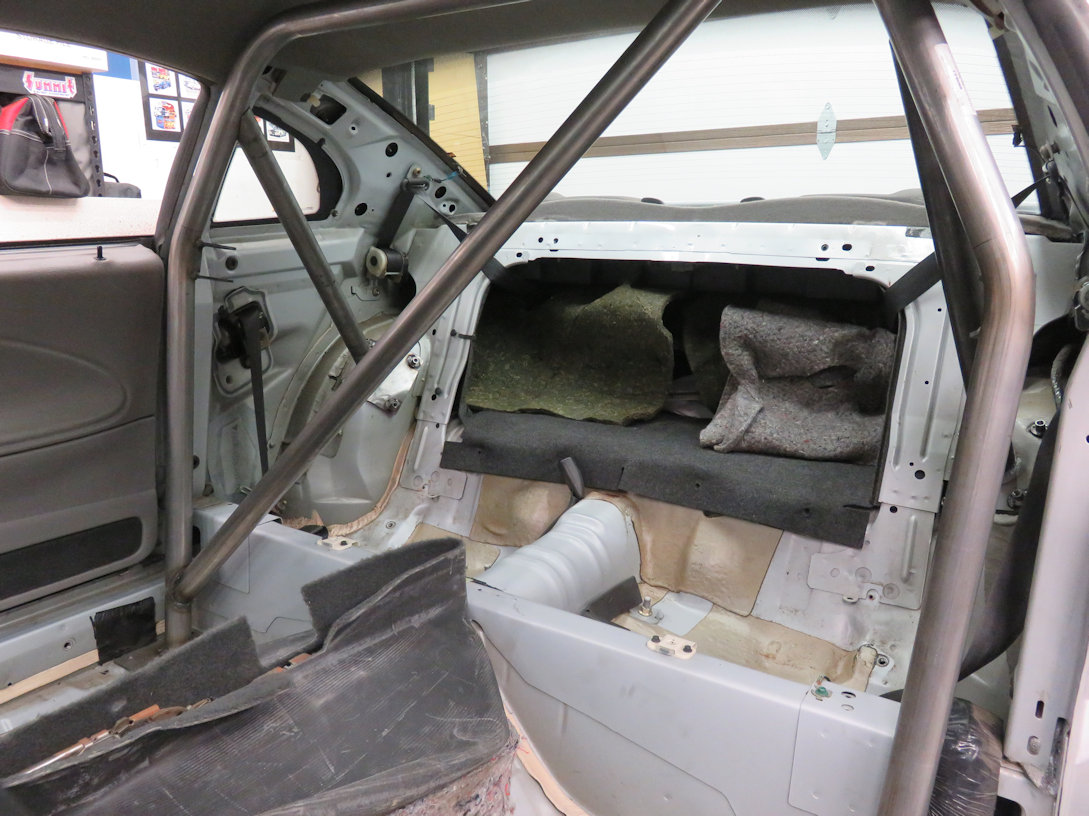
Roll bar installation.
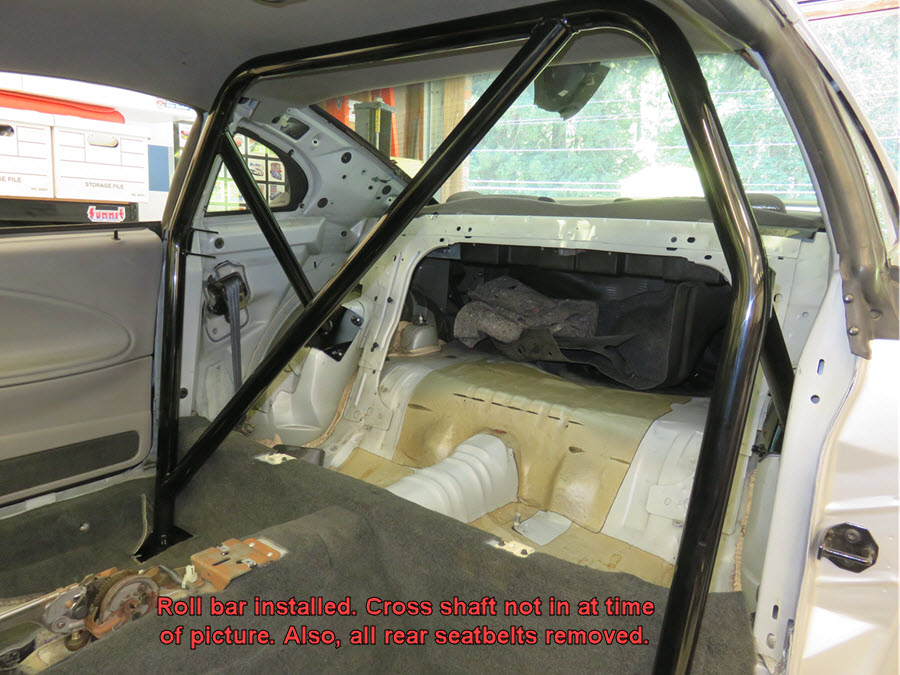
Final roll bar install.
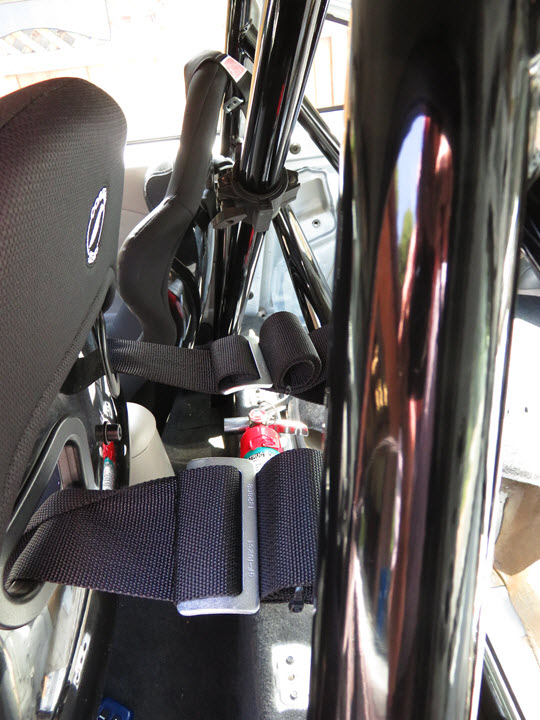
Rear of seat showing belt mount and fire extinguisher.
I have no plans on putting any of the rear trim back in the car so it will all be sold or tossed into recycle. I also removed all the seatbelt assemblies and rear seat panel. I may make a custom panel to help deaden the exhaust drone while driving. I installed my new Corbeau FX1 seats from Late Model Restoration, G-Force cam lock 5 point harness from Summit Racing and fire extinguisher.
When installing the Corbeau seats, I installed their manual seat track. The fit was fine, but it put me sitting too vertical for my liking in the car so I cut 3/4" off the rear riser brackets where it mounts to the floor and lowered the rear, giving it a slight rake to the seat. The fit was perfect for me. I can now easily sit in the car with a helmet on and actually not have my head hit the roof! I had my buddy take the car for a session at Sonoma Raceway and he said the seats were perfect and actually liked the fit more than his and he has Corbeau as well. I think it was mostly the tilting of the seat back. I did both driver and passenger seats this way. It also makes shifting the car more comfortable with the MGW short shifter the previous owner had installed.
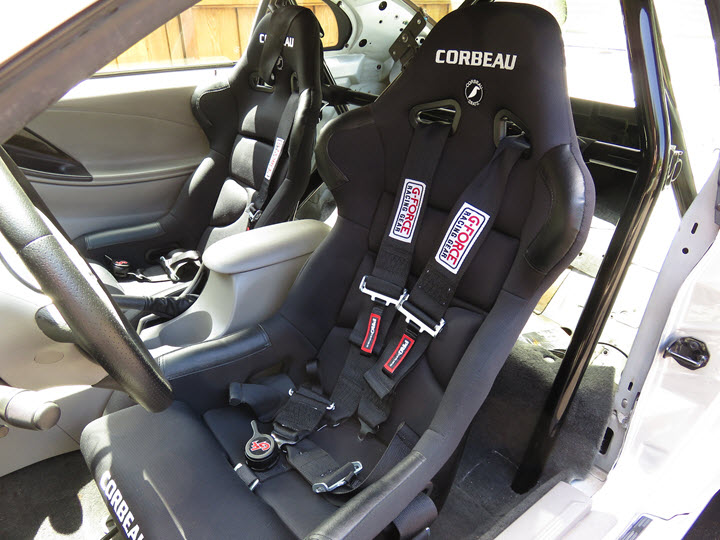
New Corbeau FX1 race seats and G-Force cam lock 5pt. harness.
Tow Hook Fabrication
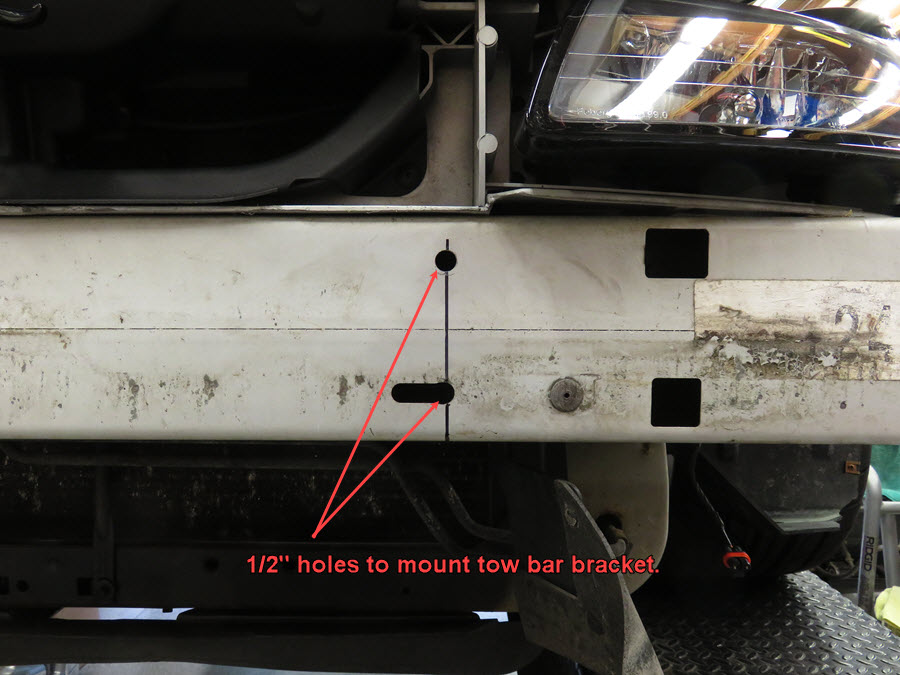
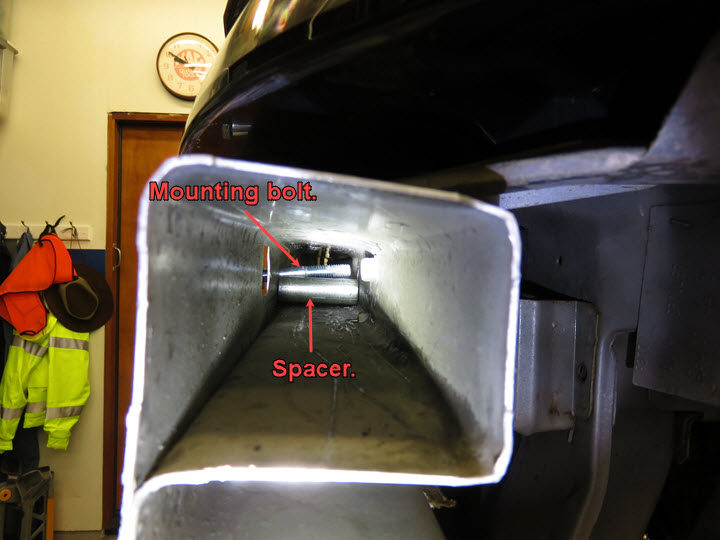
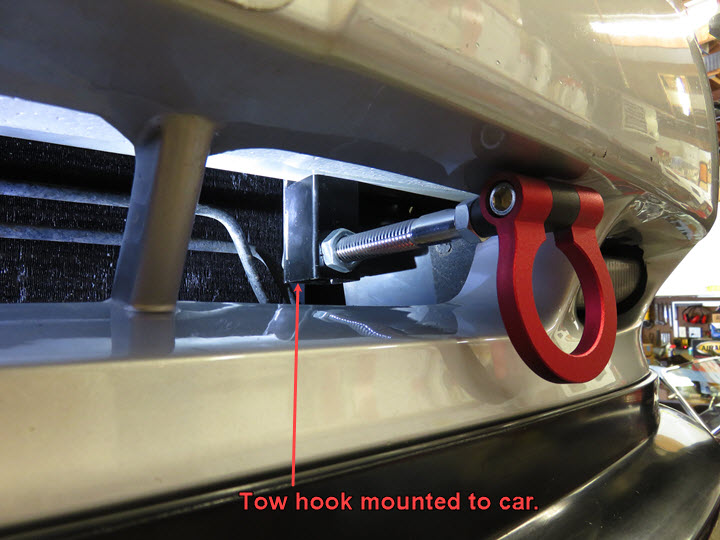
Another item that needed attention was a tow hook front and rear. I designed a bracket to go behind the two bumper bars and come out in the lower front facia area. It was fairly simple with a 1 1/2" bar about 8" long with a box tube 2"x 1 1/2" welded to one end. Then I drilled two holes through each bumper bar, installed bolts and secured it to the bumper. The box tube on the lower end was pressed up to the bottom of the lower bumper tube to lessen the flat bar from bending if the car was towed. I din't have to use it as of this writing and hope I don't need it, but if I do, it's there. I still have to make something for the rear.
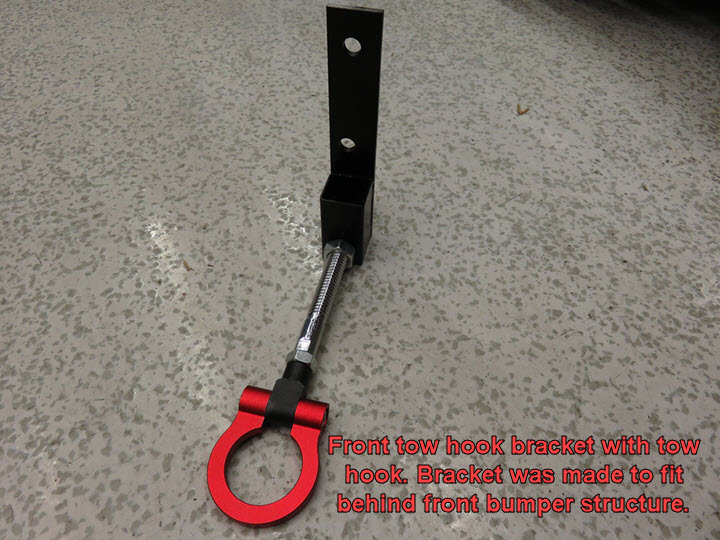
Manufactured tow hook bracket. This will bolt to the rear of the bumper tubes.
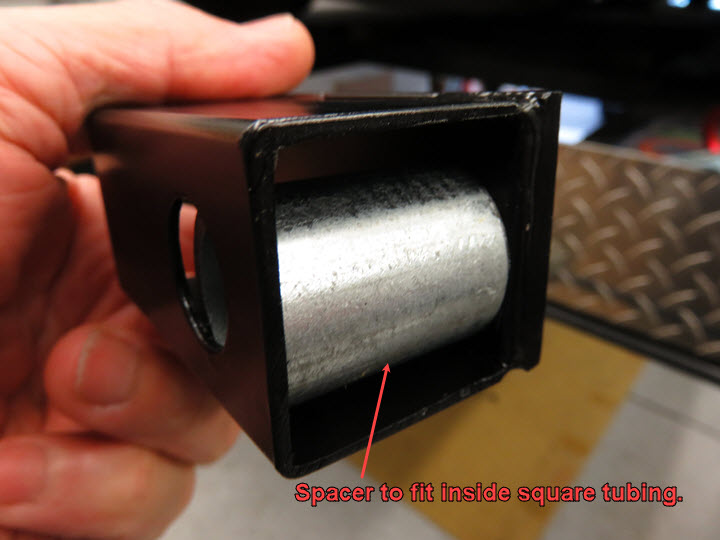
Spacer for box tube so it won't crush when tightening tow bolt.
Installing two spacers (top tube & bottom tube) to keep from crushing bumper.
Tow hook installed showing bottom 2" x 1 1/2" box tube up against lower bumper tube.
This is to keep the flat bar from bending when towing.
Dash Gauge Overlay
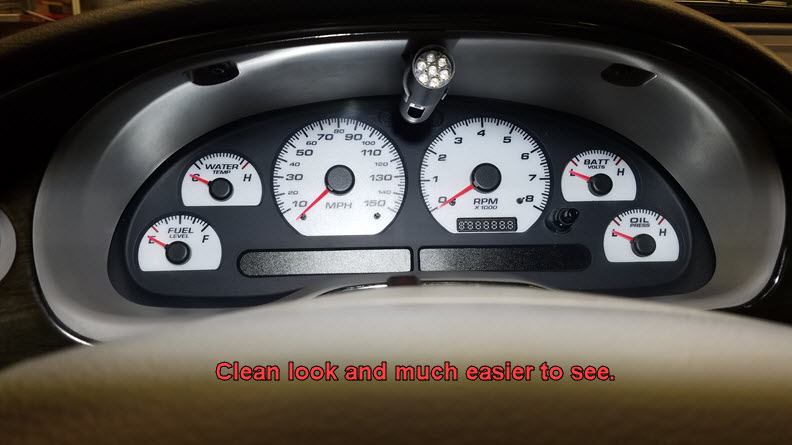
After driving the car for a few months on and off, I found the dash very hard to see in daylight as well as night driving. The cluster just doesn't "pop" like you would expect and doing a quick glance so see how fast (or slow) you're going as well as monitoring gauges was miserable. I started looking for a replacement cluster and came across several types of overlays. Most of them looked good but the one I like the most was one from NVU.
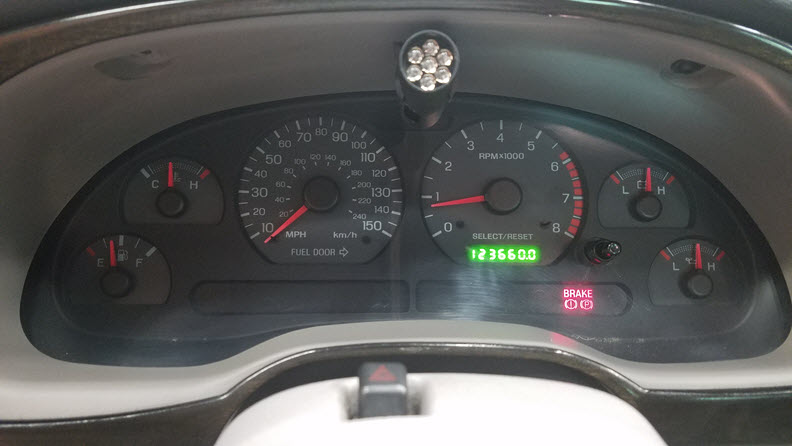
Original dash readings after engine has come to full operating temperature.
Instuctions say to take a picture of the dash gauges so you know where you'll place the pointer needles back in a relative position.
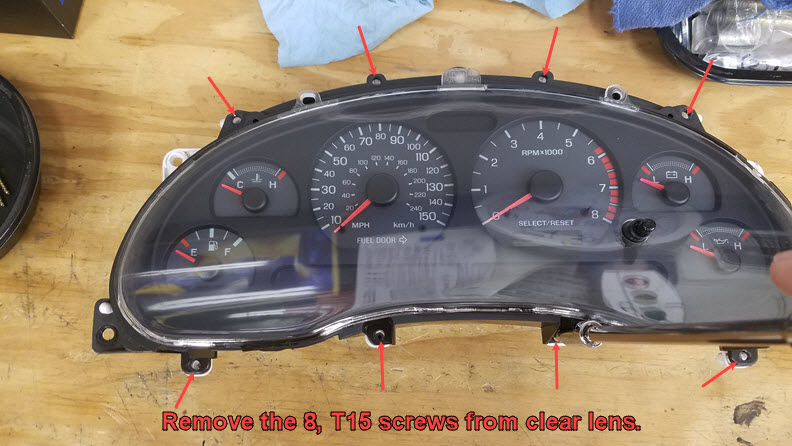
Removing dash lens. Once removed you can remove the pointers.

After stock overlay is removed, there is a small bit of plastic (they are heat pressed on) that needs to be removed from the surface.
I used a new razor blade and carefully removed the plastic bits, which were right around the pointer holes. Clean the surface good when done.
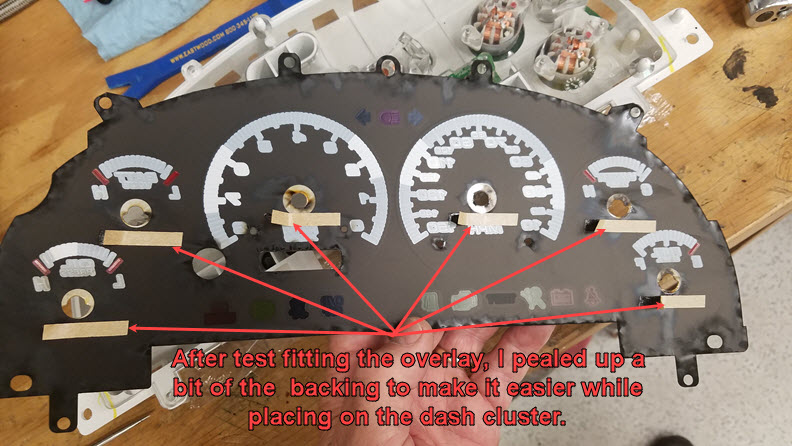
I pulled a small corner of each of the glue strips away to make it easier when getting ready to apply the new overlay.
I had already test fitted the overlay so I know where it would be positioned.
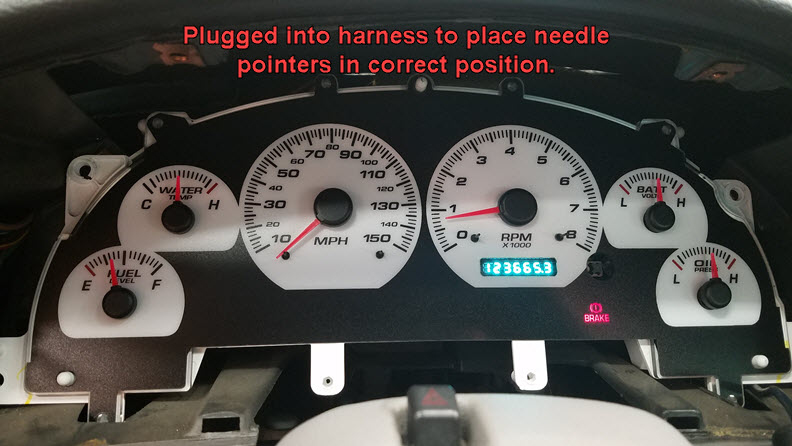
Dash plugged in harness and just set in dash to go down the road to verify my calibration.
A big reason for me picking this one was the incremental marks between the high and low marks on gauges as well as the MPH an RPM. The tachometer also does not have the redline marking, which I really like. I use my shift light to help for that.
The instructions are pretty cut and dry and the only thing I would add is when you're resetting the needles back on the gauge spindles, do a test drive to insure they are accurate and functioning properly. The cluster will easily sit in it's space without screws so you can apply them as needed. I used a Garmin and my SCT tuner to verify speed, rpm and temperature.
New cluster installed showing what it's like in normal daylight driving.
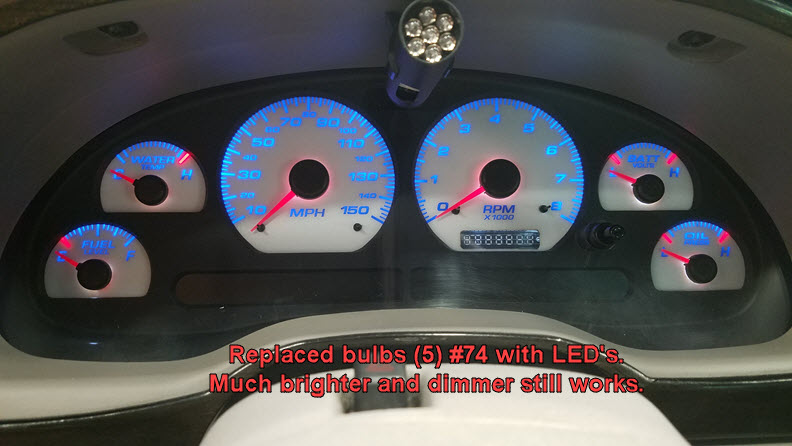
New cluster with new LED lighting on showing the blue markings.
I had previously mounted my Raptor shift light in the center of my dash area. I've been using these for 15yrs and like the simplicity. I'm able to set my desired shift point in a matter of seconds. This one does not need a tach driver to operate. I wired it directly to the ECU #1 coil output and power and ground. I'm not a "wire tap" person, so I de-pinned, soldered and heat shrunk my connections.
I also installed a Solo2 Lap Timer in the car so I can track my lap times good or bad. I removed the radio (temporary) and made a plastic plate to bolt to the dash with the bracket for the timer. I'll come up with another way of install/removal so I don't have to take the dash apart, event hough it's not a hard job. I just have to find a good place that isn't an eyesore.
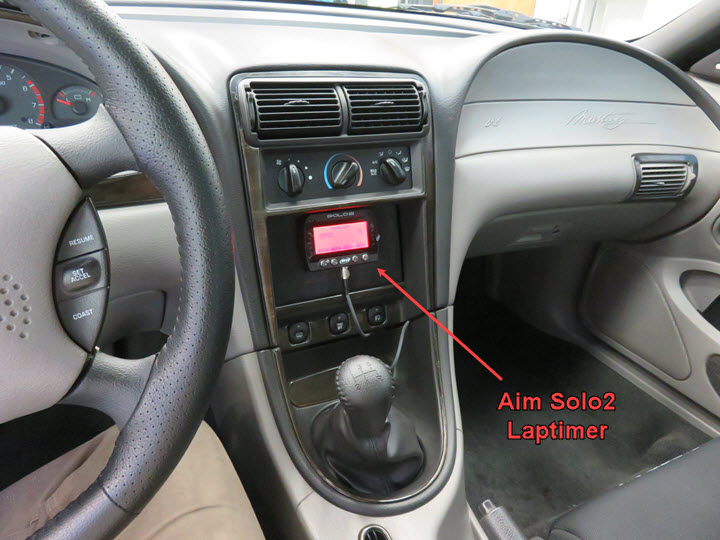
My Solo2 lap timer.
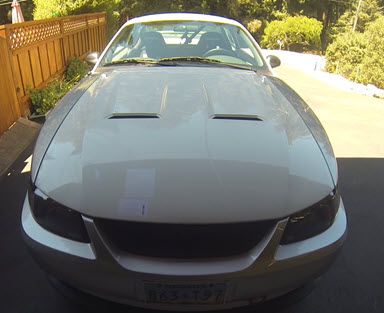
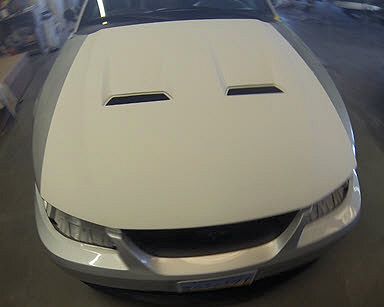
Heat Extractor Hood
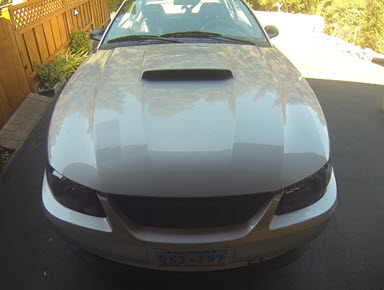
Decided to put a new hood on to make engine heat escape easier. Thought about just putting in vents, but that was just getting too tacky for me. I searched around and found a hood I liked at Cervinis. I purchased the Heat Extractor hood and had it sitting in my garage until I finished the Coyote swap. I must say I was very pleased with the fit and finish and I didn't have to do any real body work other than adjusting the hood latch. I did have to reach out to them because they forgot to put the Ford louvers in the box, but were very amicable getting them to me.
I did need to do some minor filing of a hinge bolt hole to give me some adjustment, but that was about it for bolting on. Once secure, the hood looked great and I like this hood much more than the stock "fake scoop" hood. It gives the car a much cleaner look to me.
 Look of stock hood. Look of stock hood. |
 Cervini hood fit. Cervini hood fit. |
 Actually looks happy. Actually looks happy. |
Final shot showing the look of the new hood, painted and installed ready to go. It made the car look a lot sleaker and mean!